How Agencies Can Benefit from Using Assistant Pro (4 Ways)

There are many tools you could use to share assets with your team members and clients, such as Google Drive and Dropbox. However, if you have lots of files across multiple WordPress projects, you may be looking for a more efficient solution. Fortunately, Assistant Pro is a cloud-based solution that was built specifically for WordPress and enables you to store, organize, and share creative assets more easily.
In this post, we’ll take a closer look at Assistant Pro, and discuss four ways that agencies can benefit from using this tool. Let’s get started!
A Brief Introduction to Assistant Pro
Assistant Pro enables you to save, export, and import creative assets, including layouts and images:
It’s particularly useful for agencies since it’s designed to streamline team projects, allowing you to create shared libraries with unique access controls. You can even use it to share content with clients and get their feedback.
To connect the platform to WordPress, you’ll need to install the Assistant plugin on your site. Then, you can log into your Assistant Pro account to start organizing your content.
How Agencies Can Benefit from Using Assistant Pro (4 Ways)
Now, let’s look at a few ways that your agency can benefit from using this practical tool.
1. Organize WordPress Content into Libraries
With Assistant Pro, you can organize your designs into content libraries. This way, you’ll be able to reuse your layouts and other content in future projects. Plus, you can give clients and team members access to specific libraries to facilitate collaboration.
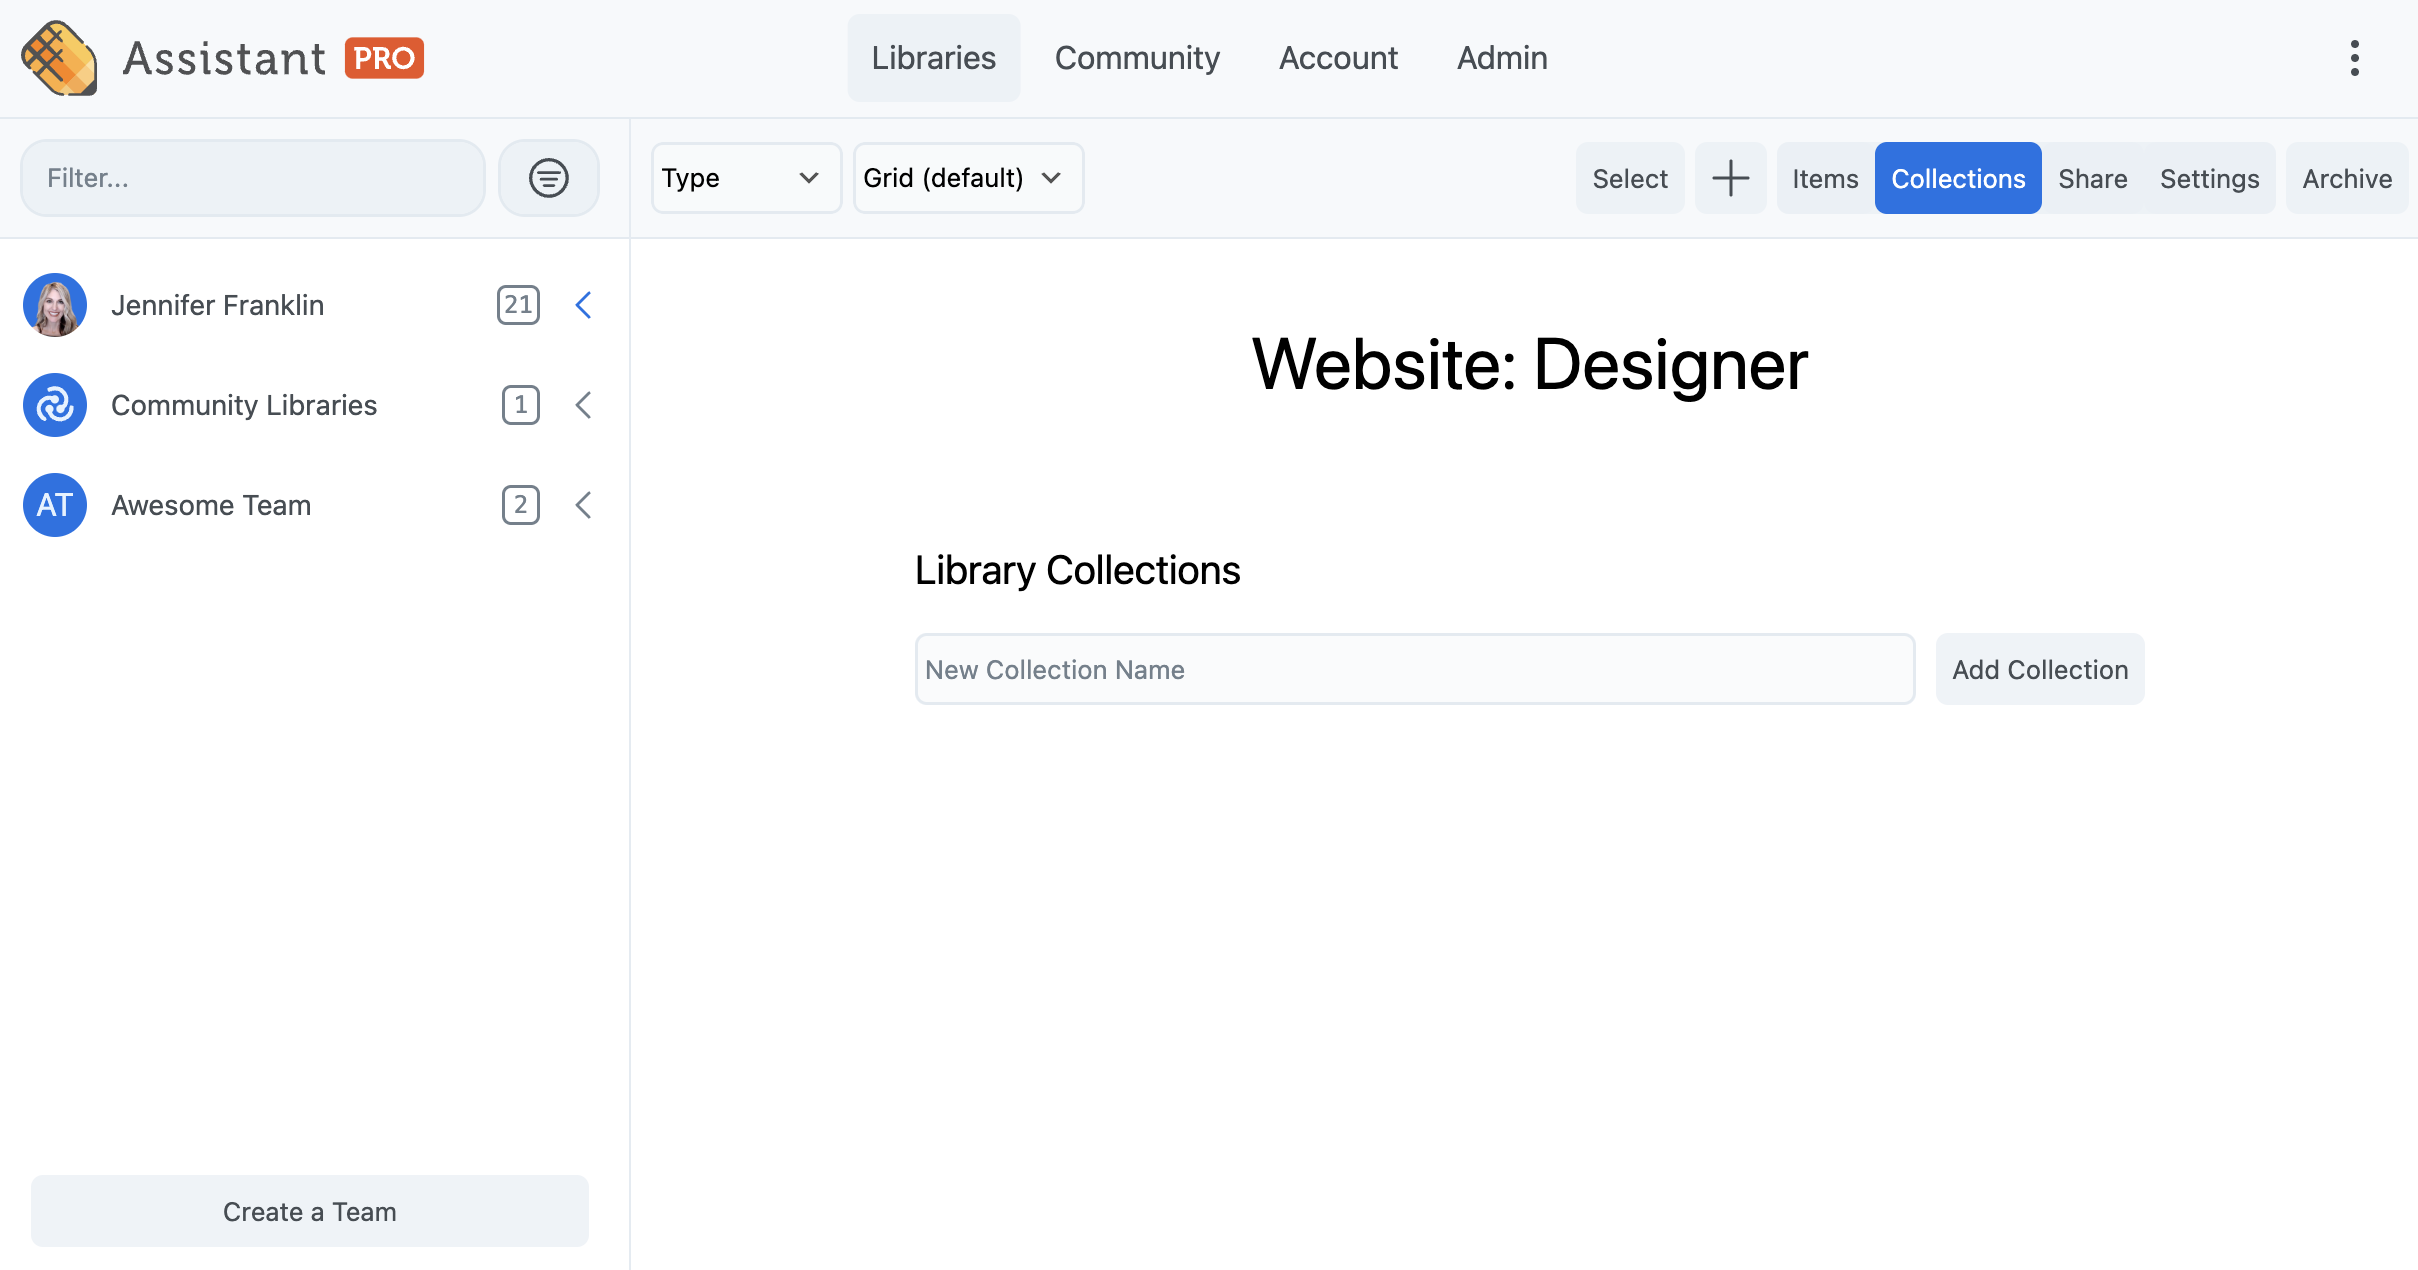
Assistant Pro libraries are completely customizable. It’s up to you how you would like to organize your content. For example, you might decide to organize your WordPress assets by type or you may prefer to sort by project. Either way, you can further segment your items by Collections within libraries similar to WordPress tags:
These libraries can house content like wireframes, media files, layouts, color codes, and more.
Through the Assistant plugin, libraries can be shared between an individual website and the cloud, making them accessible to other websites, other Assistant Pro cloud users, and Assistant Pro cloud team members.
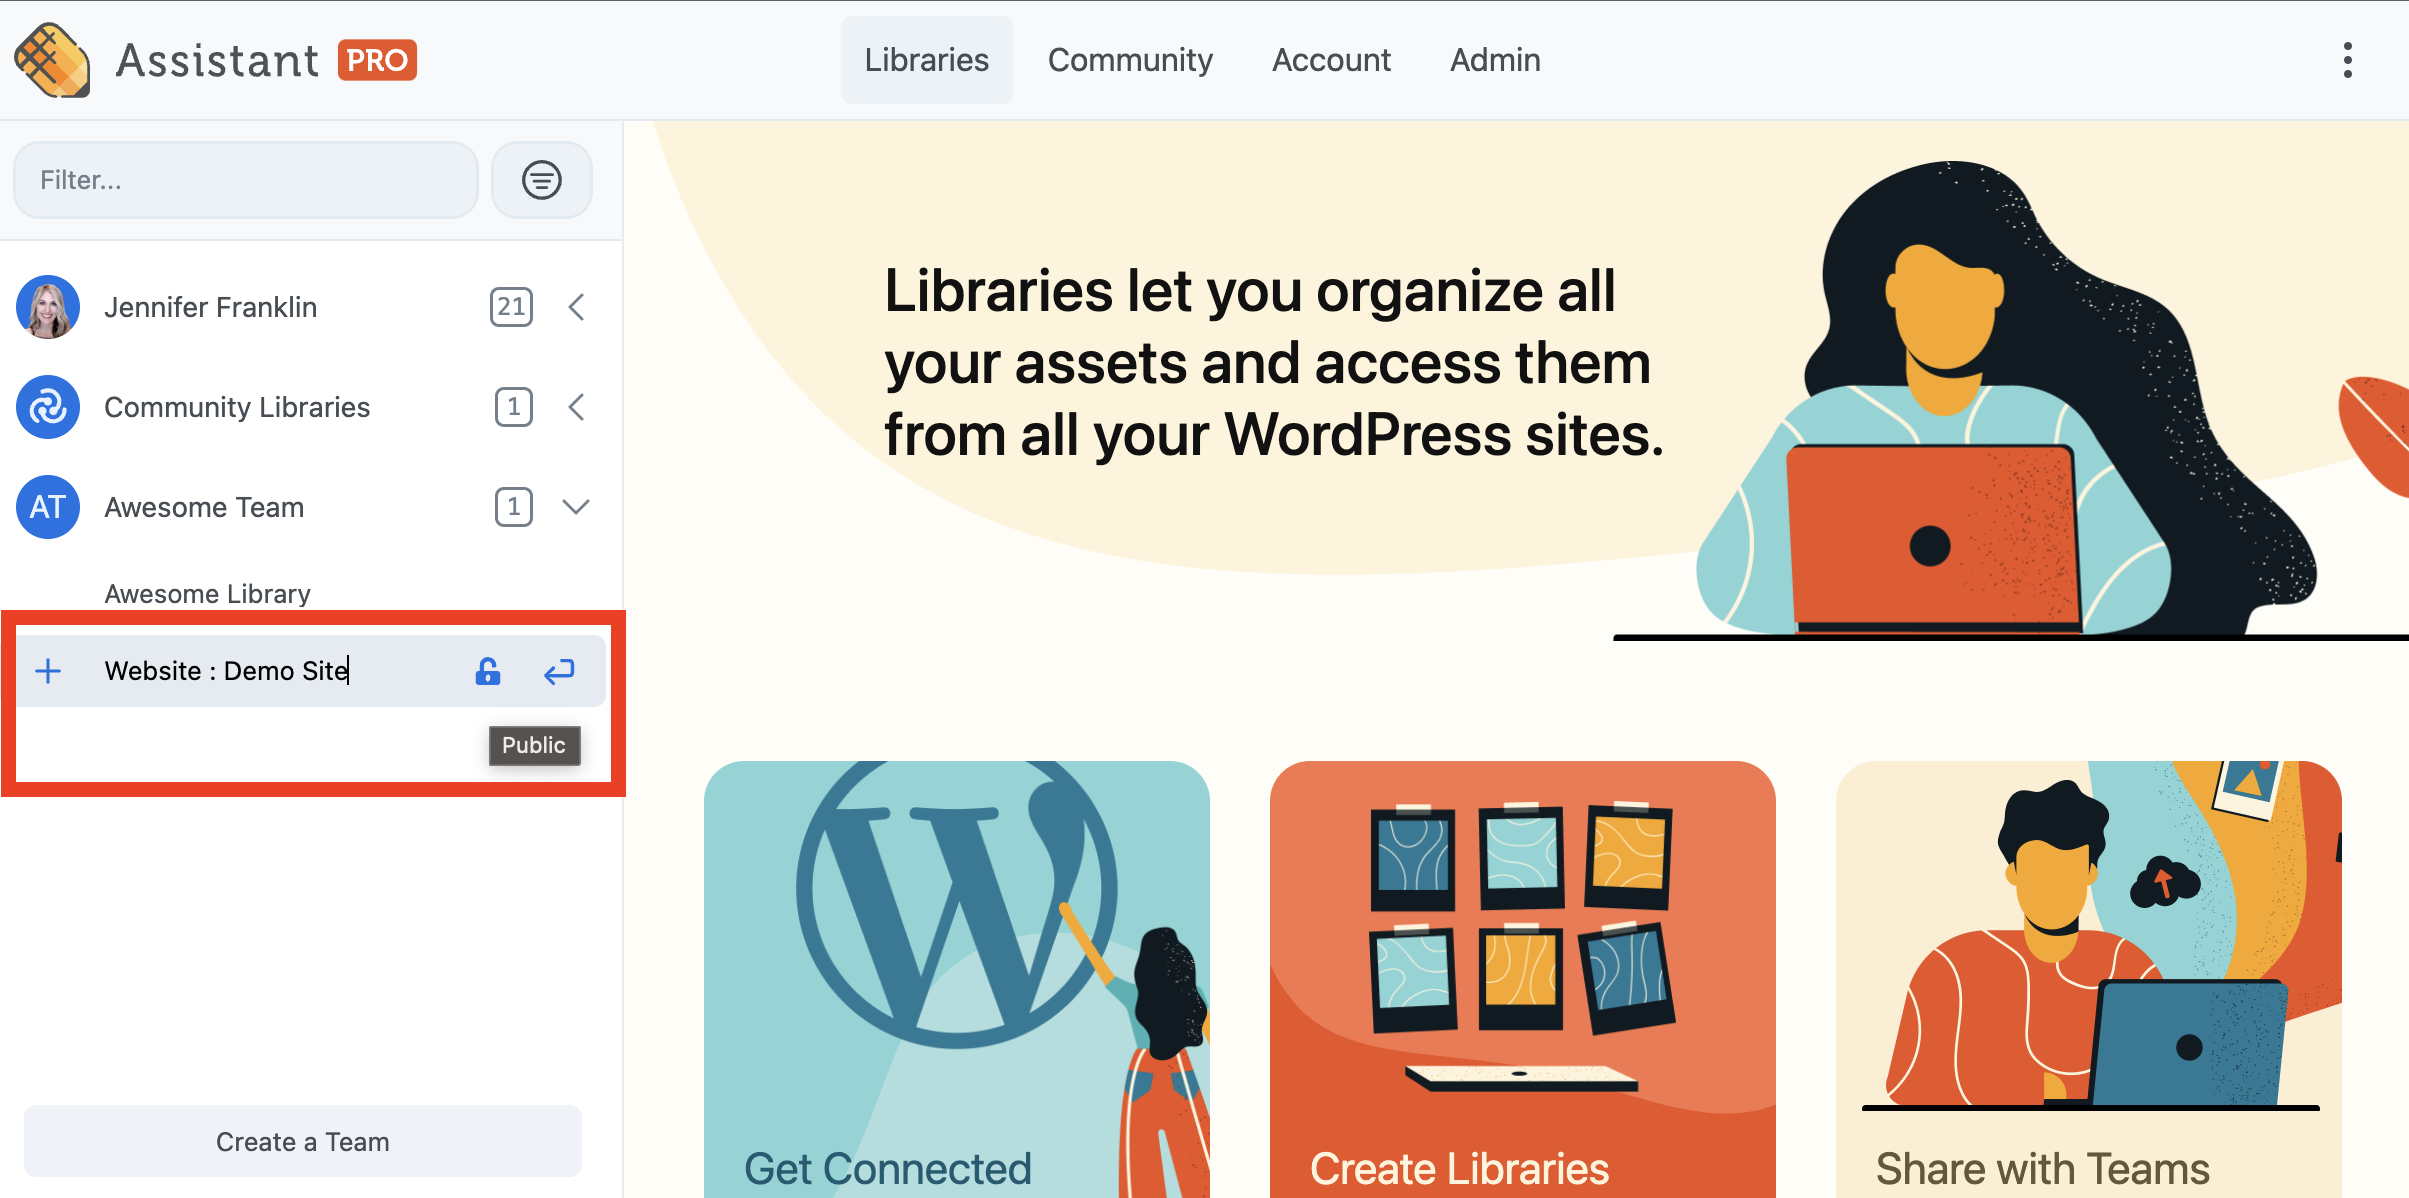
You can also upload assets from your desktop directly to your Assistant Pro cloud account. Simply login to your Assistant Pro dashboard. In the left sidebar found under the Libraries tab, click on Create Library:

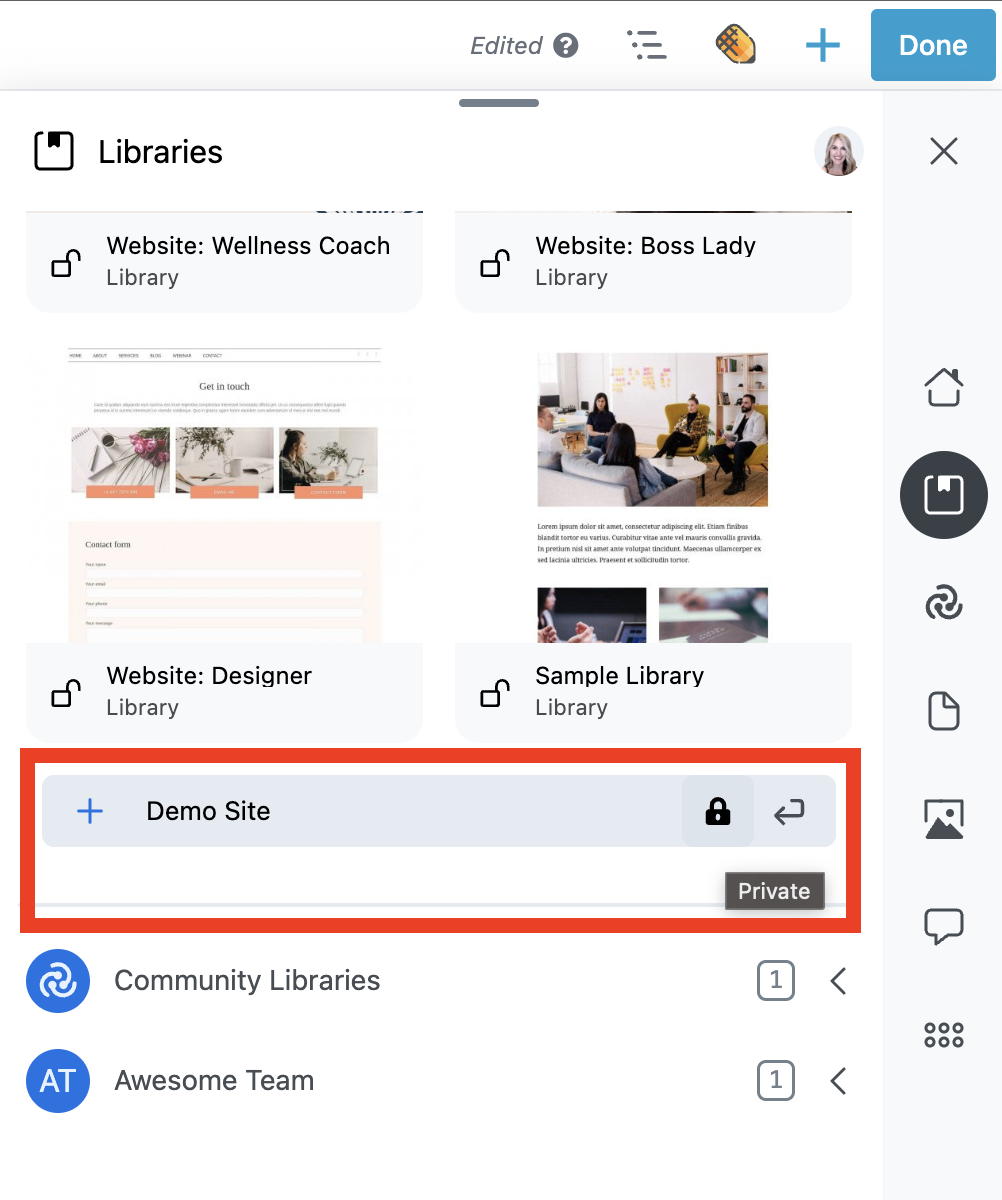
Give your new library a unique name. Then click the padlock icon to save it as Public or Private:
- Public Library – The entire community can see your public libraries if they click your user handle.
- Private Library – Only available for personal and team accounts. Not visible to the community
In this example, we have created our library within our Team Account. This means that the library and its permissions are shared across a team of users:
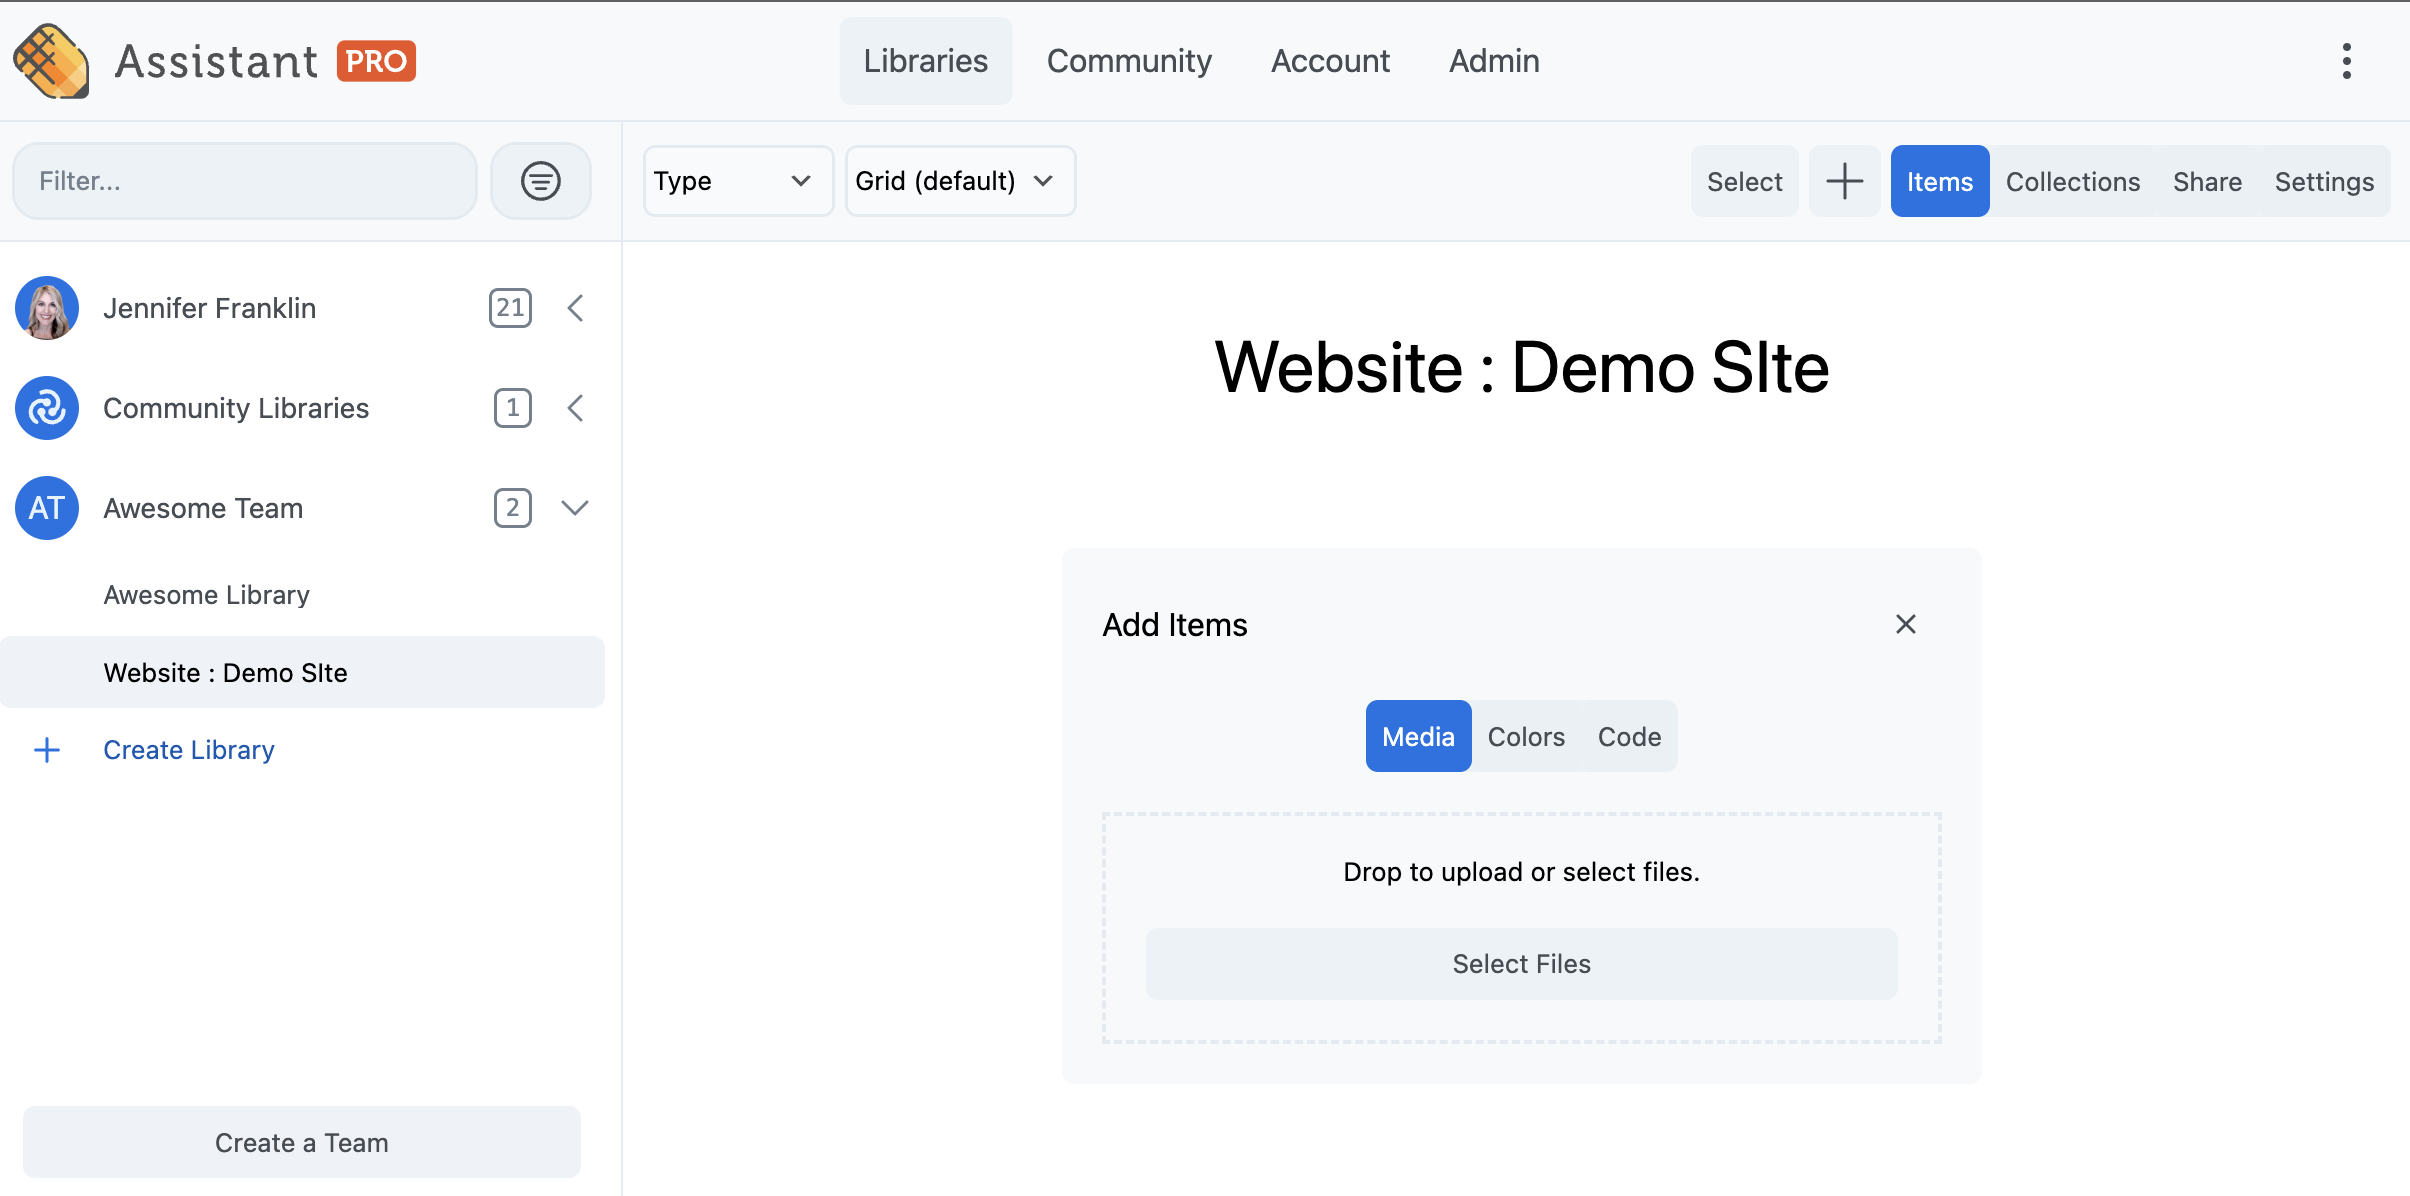
Next, select the type of content that you’d like to upload. When logged into the Assistant Pro UI, you will be able to choose from Media, Colors, and Code:
Note that depending upon the plugins you have installed on your WordPress site, you will see more options when uploading library content via the Assistant plugin. For example, WooCommerce users will have the option to save Products.
Once you have finished uploading your items, you can easily share your libraries with clients by clicking the Share tab: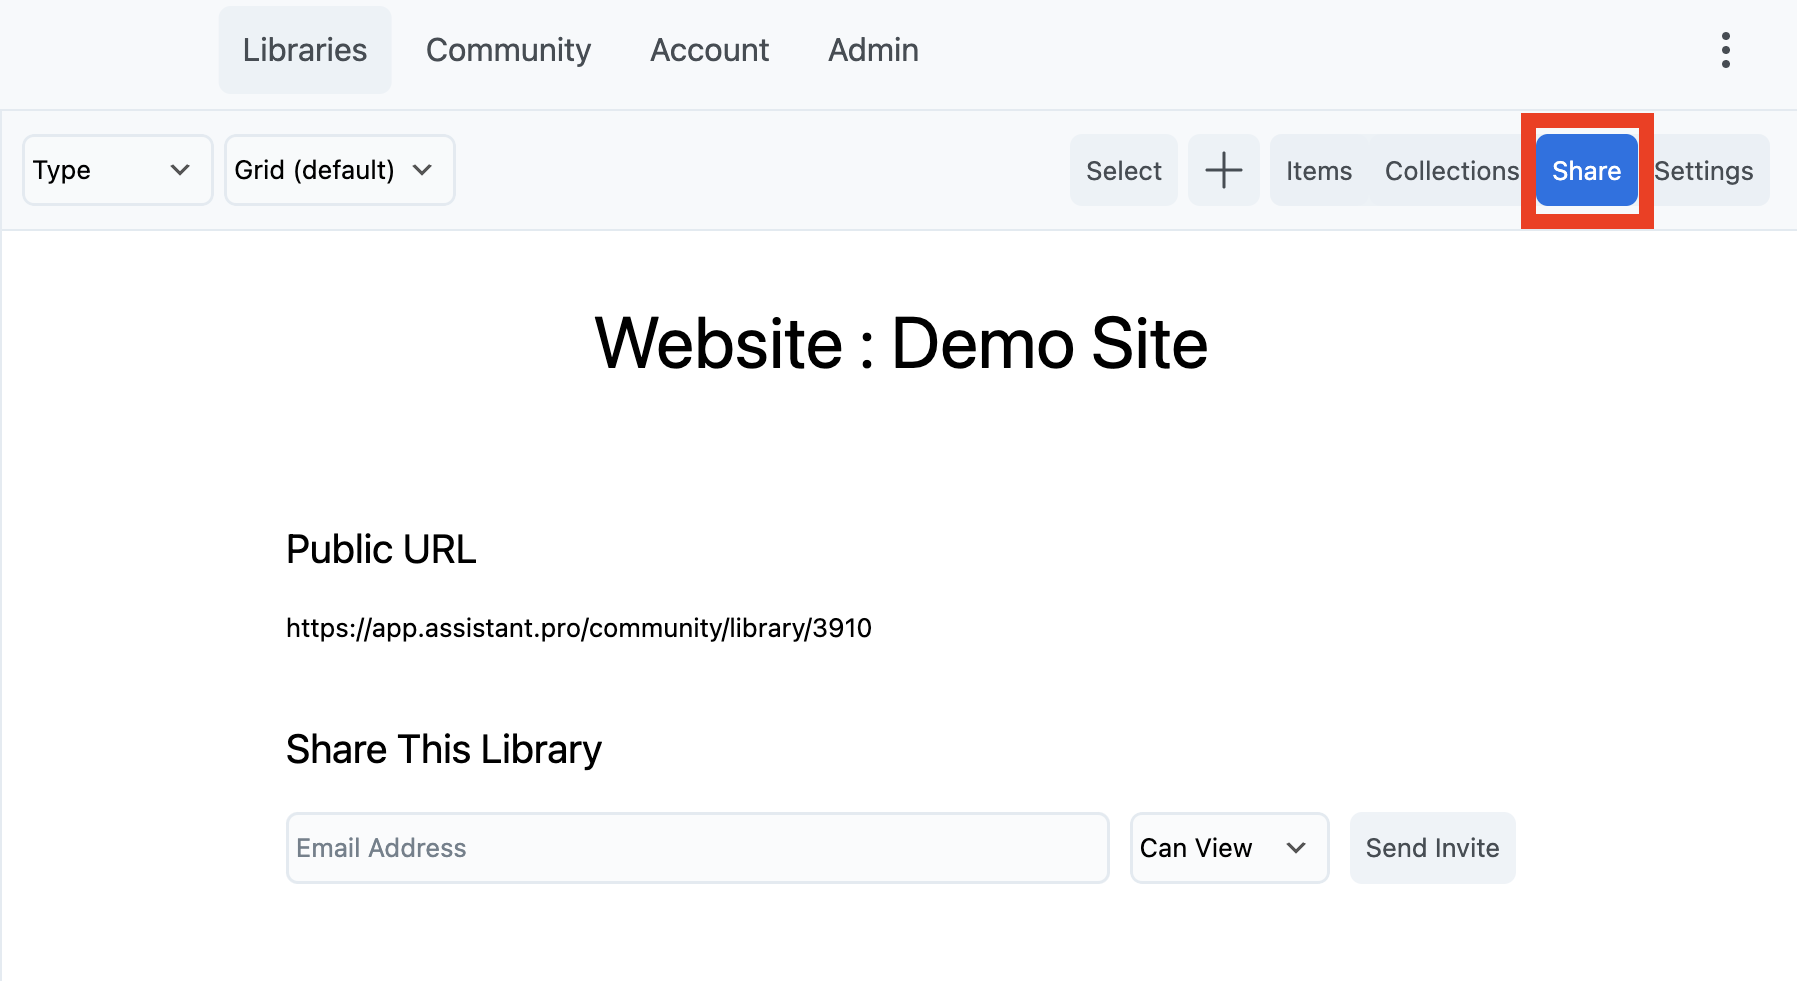
Enter the email address of the recipient. Use the dropdown box to configure your access controls: Can View or Can Edit. Then click Send Invite.
Now your team member can conveniently access your content from any location and import either the entire library or parts of the library to other WordPress websites.
2. Save WordPress Theme Settings
If you’re working on separate yet related websites, you probably find yourself applying the same theme settings over and over again. For instance, you might add the same widgets and color presets. This can be time-consuming, and it might interfere with your workflow.
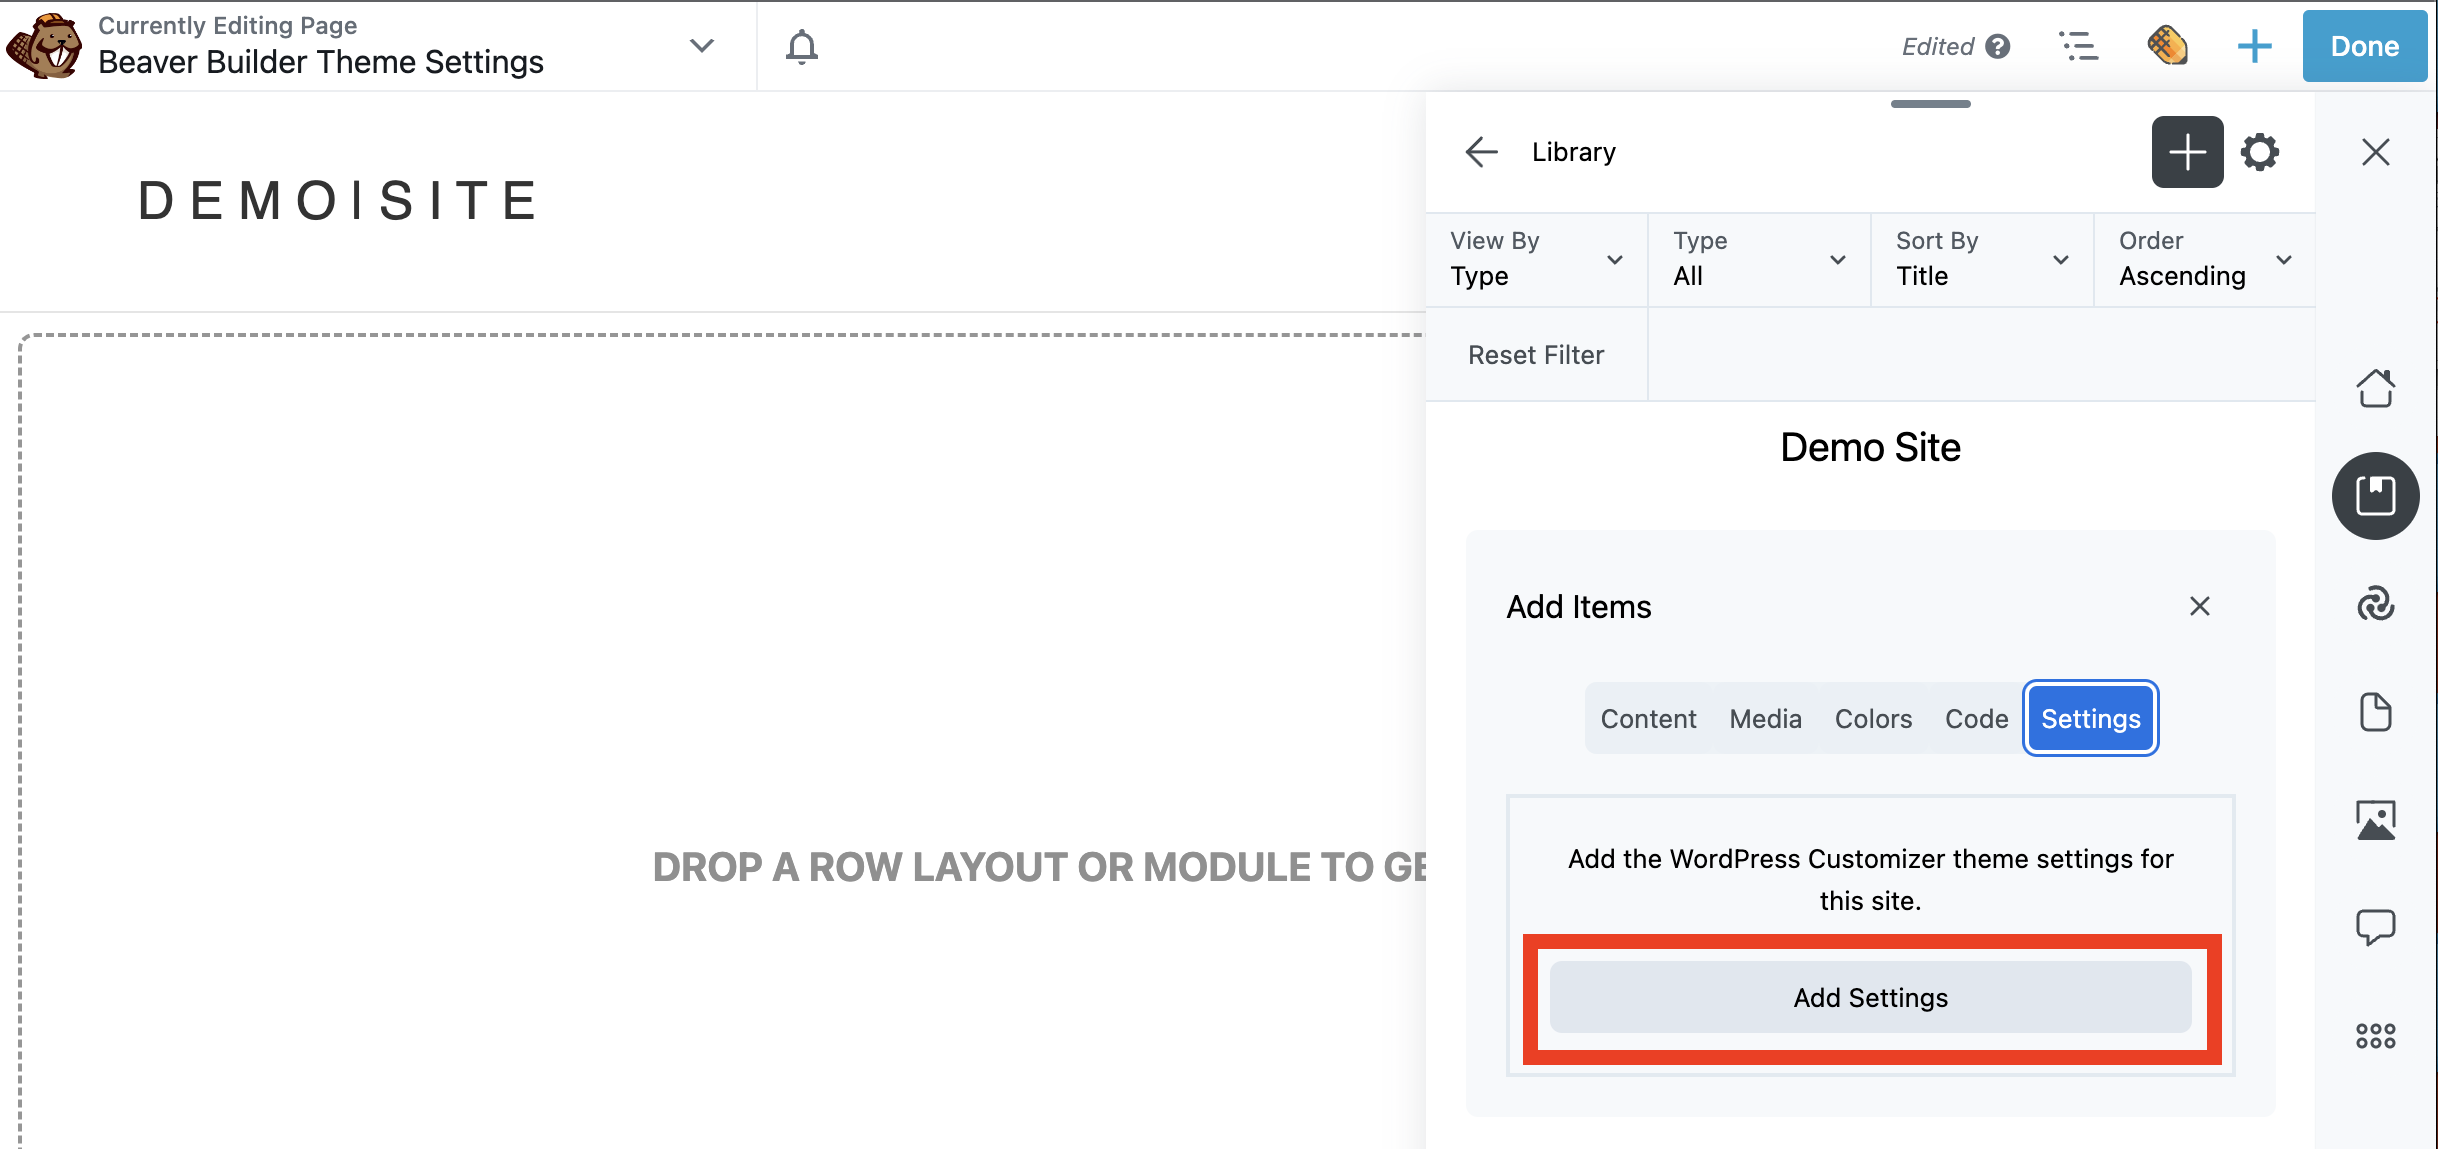
Fortunately, you can use Assistant Pro to save your current Beaver Builder Theme settings to one of your libraries. To do this, open the Assistant sidebar in WordPress. Next, select the Library app and either open an existing library or create a new one:
Then, click on Settings > Add Settings:
Your theme settings will now be saved under the Settings tab within your library. To apply them to another WordPress website, navigate to the other site. Open your library and click on the theme settings that you have previously saved.
You can click Preview to view your site with the settings applied:
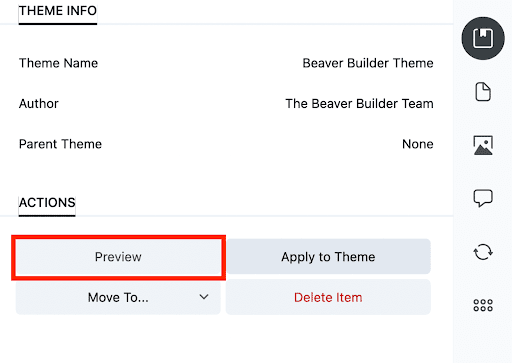
If everything looks good, select Apply to Theme:
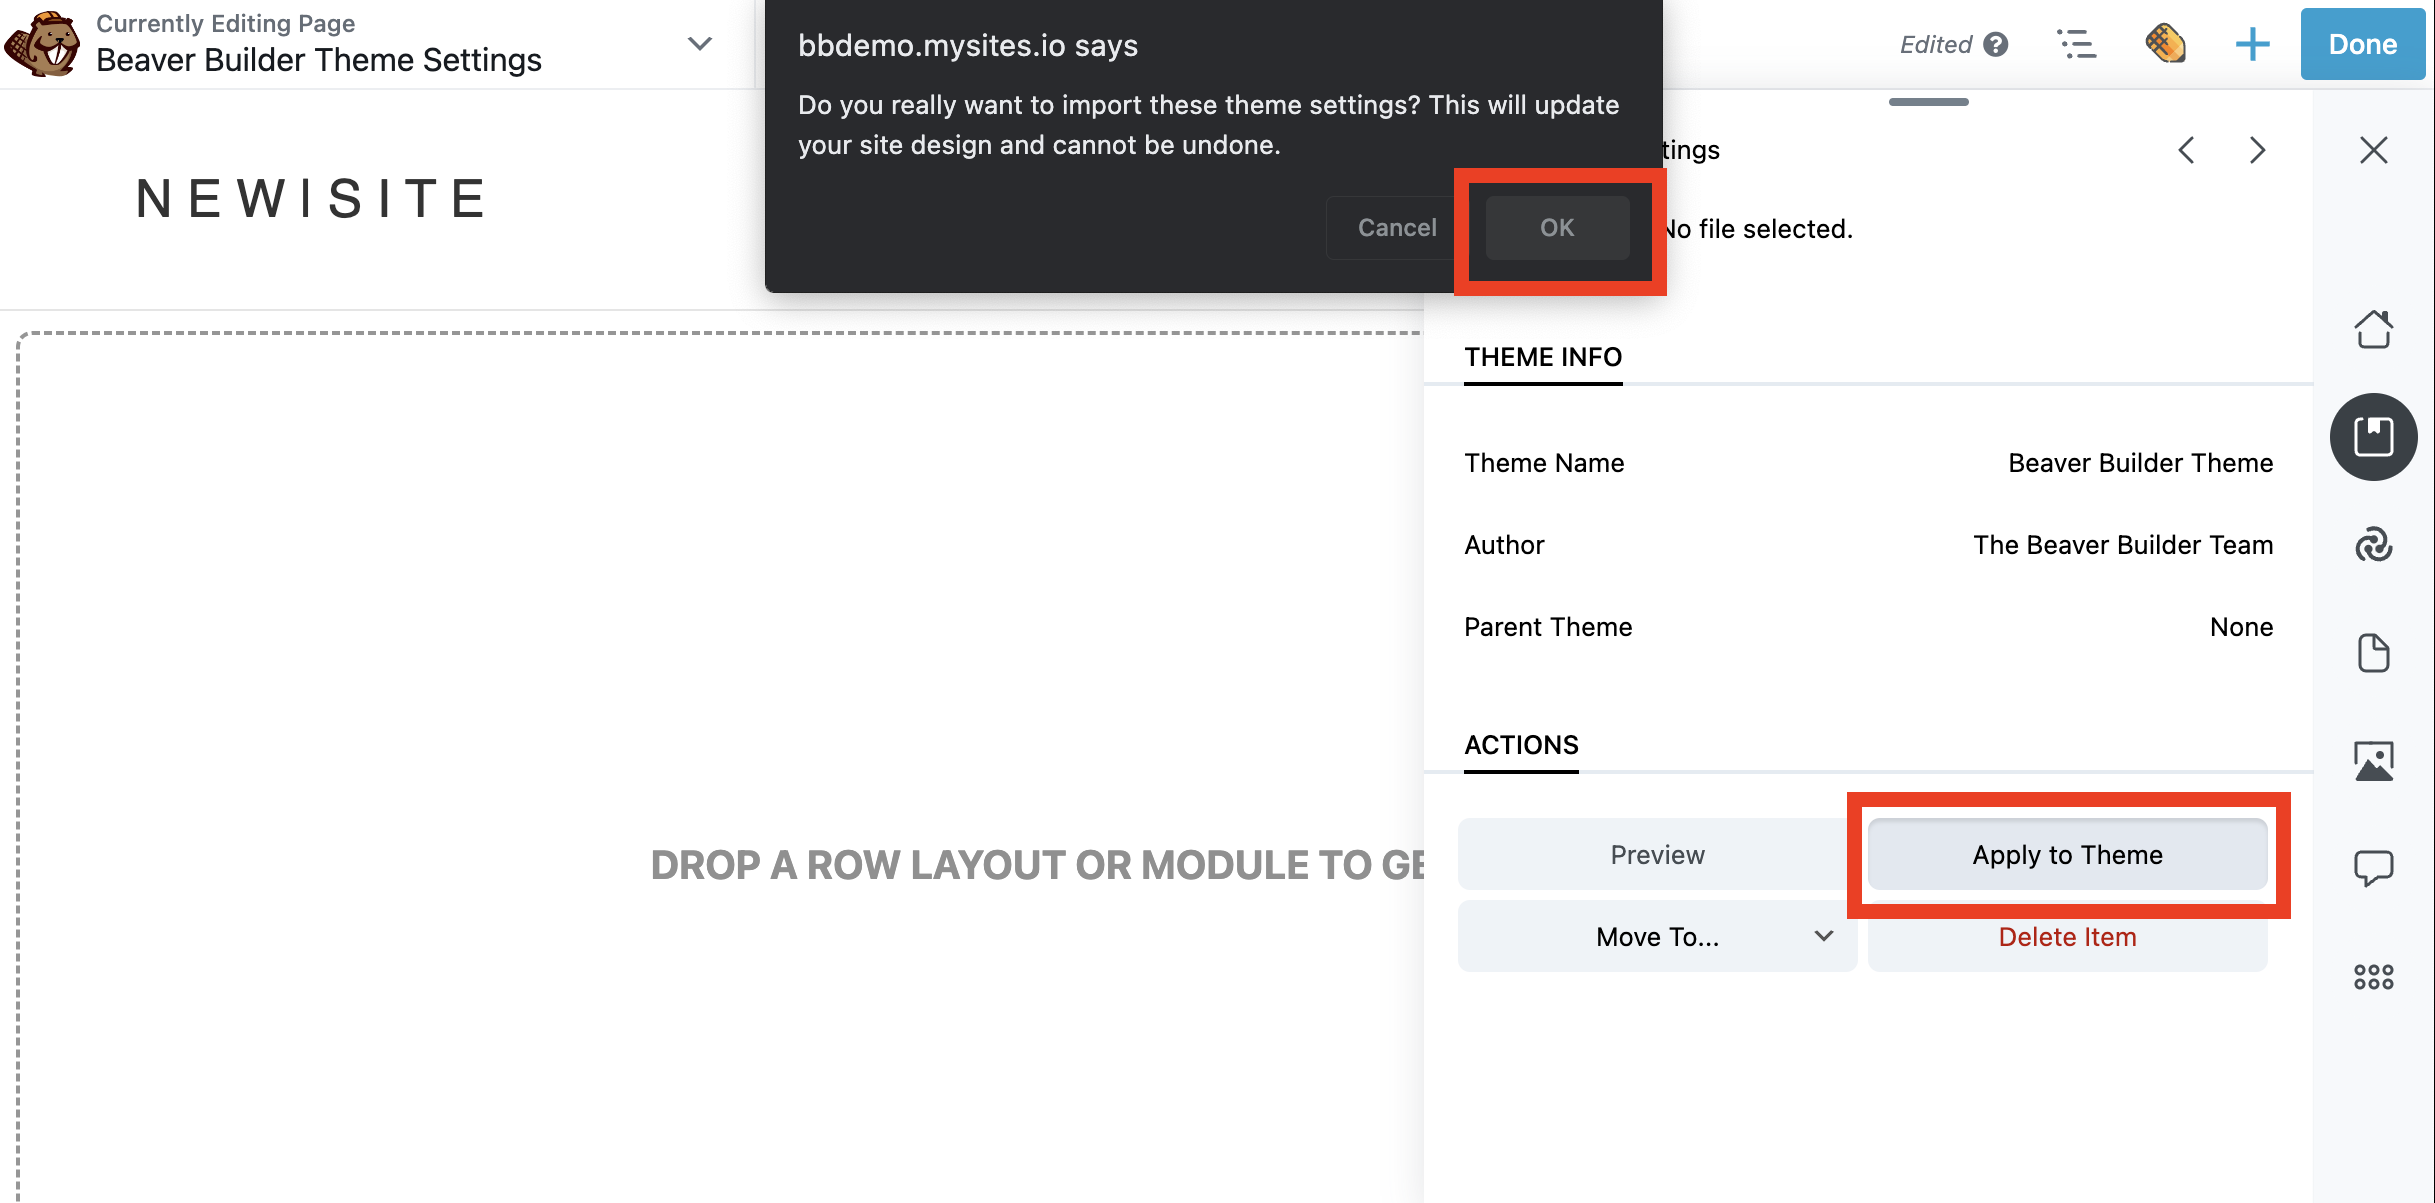
Now that your theme settings are saved within an Assistant Pro library, you can then import these theme settings (and other assets) to future sites. Note that as of right now, the export and import theme settings feature works best with the Beaver Builder Theme.
3. Store and Transfer Creative Assets
With Assistant Pro, it’s easy to store, organize, and share your content. Agencies rely on Assistant Pro to quickly spin up WordPress projects using saved items such as: theme settings, wireframes and page builder templates.
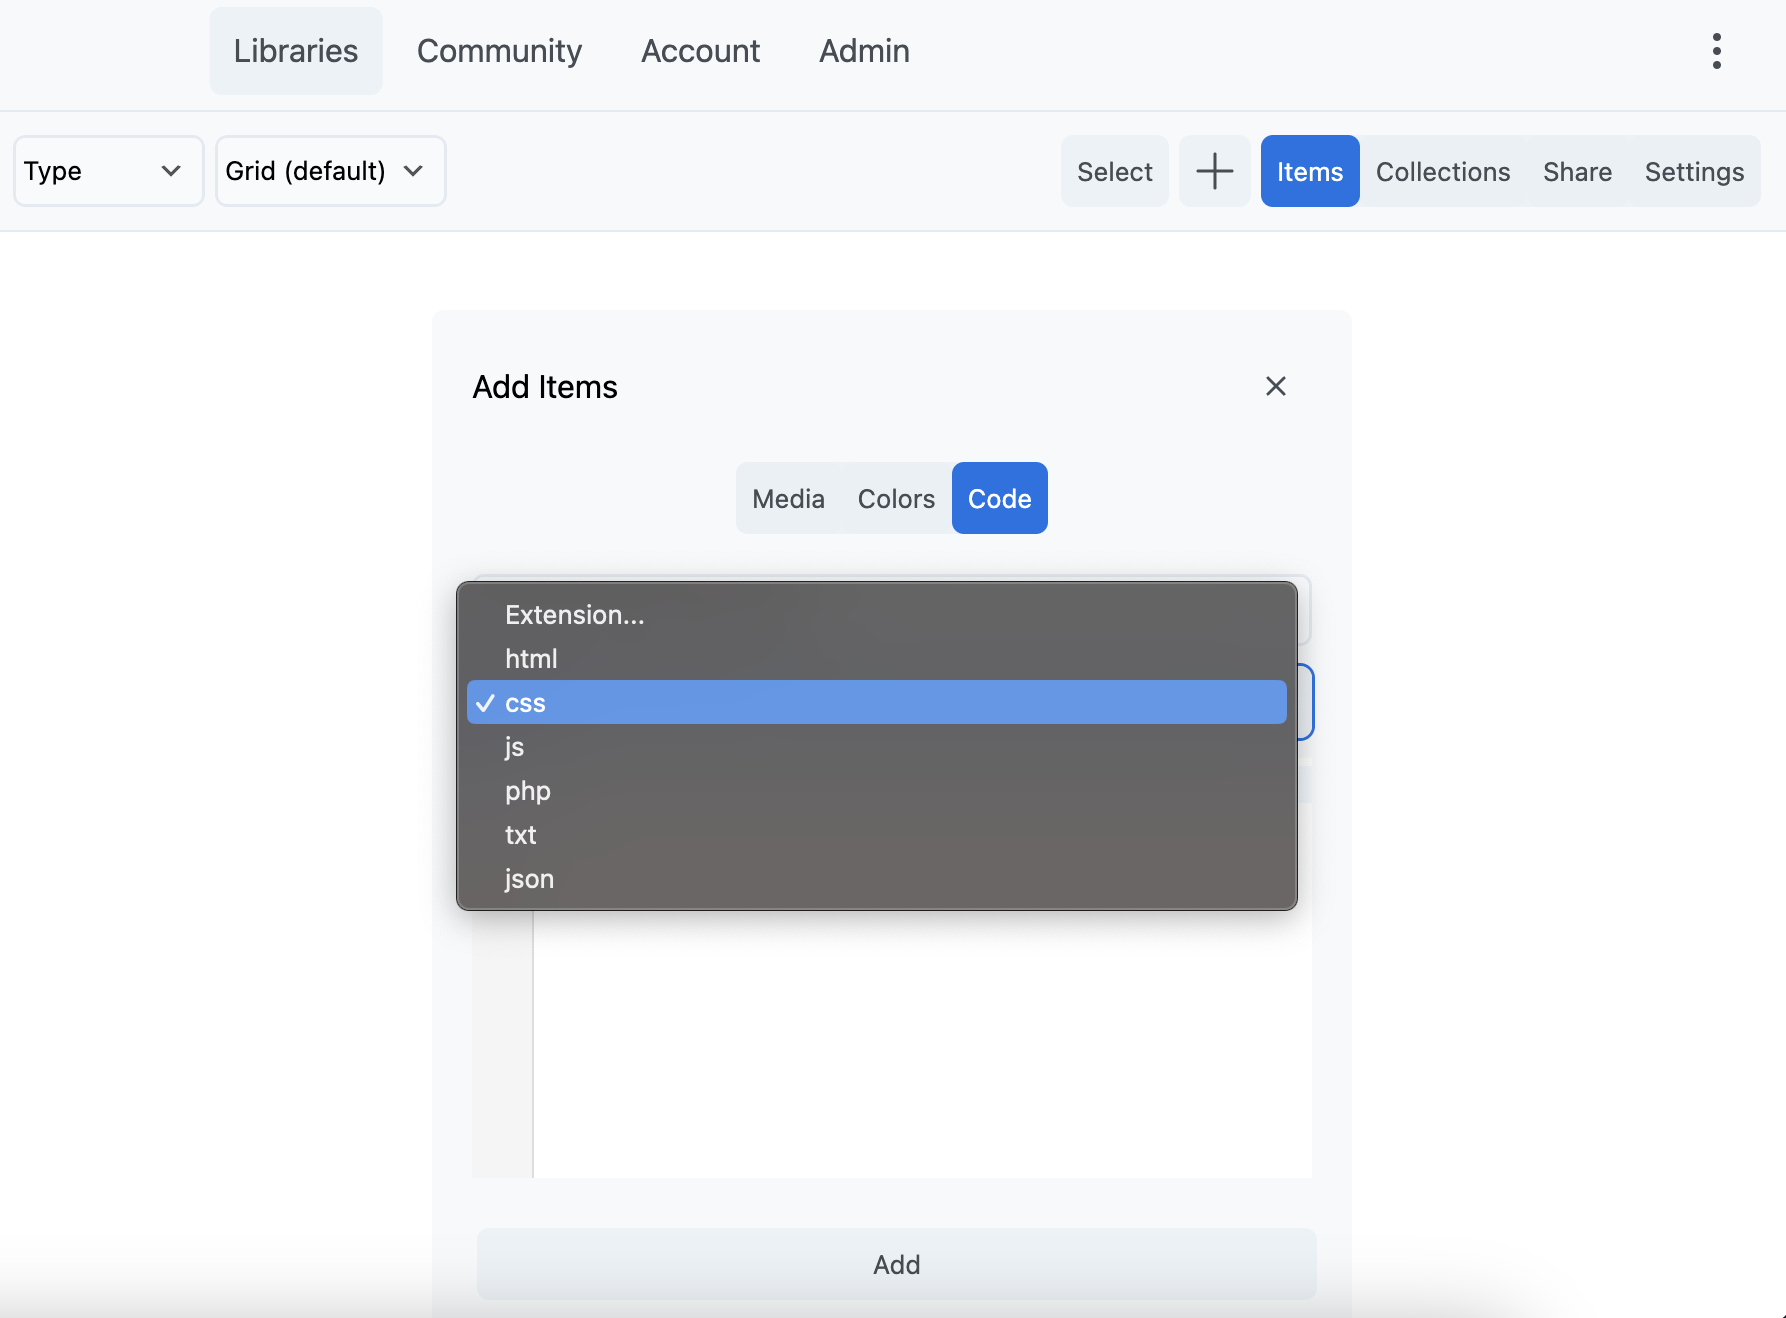
In addition, many agency owners tell us they love that you can now save code snippets:
Inside your library, switch to the Code tab. Then, give your code snippet a name and choose your extension. Assistant Pro lets you work with CSS, PHP, HTML, JavaScript, JSON, and TXT:
Enter your code. Then click Add:

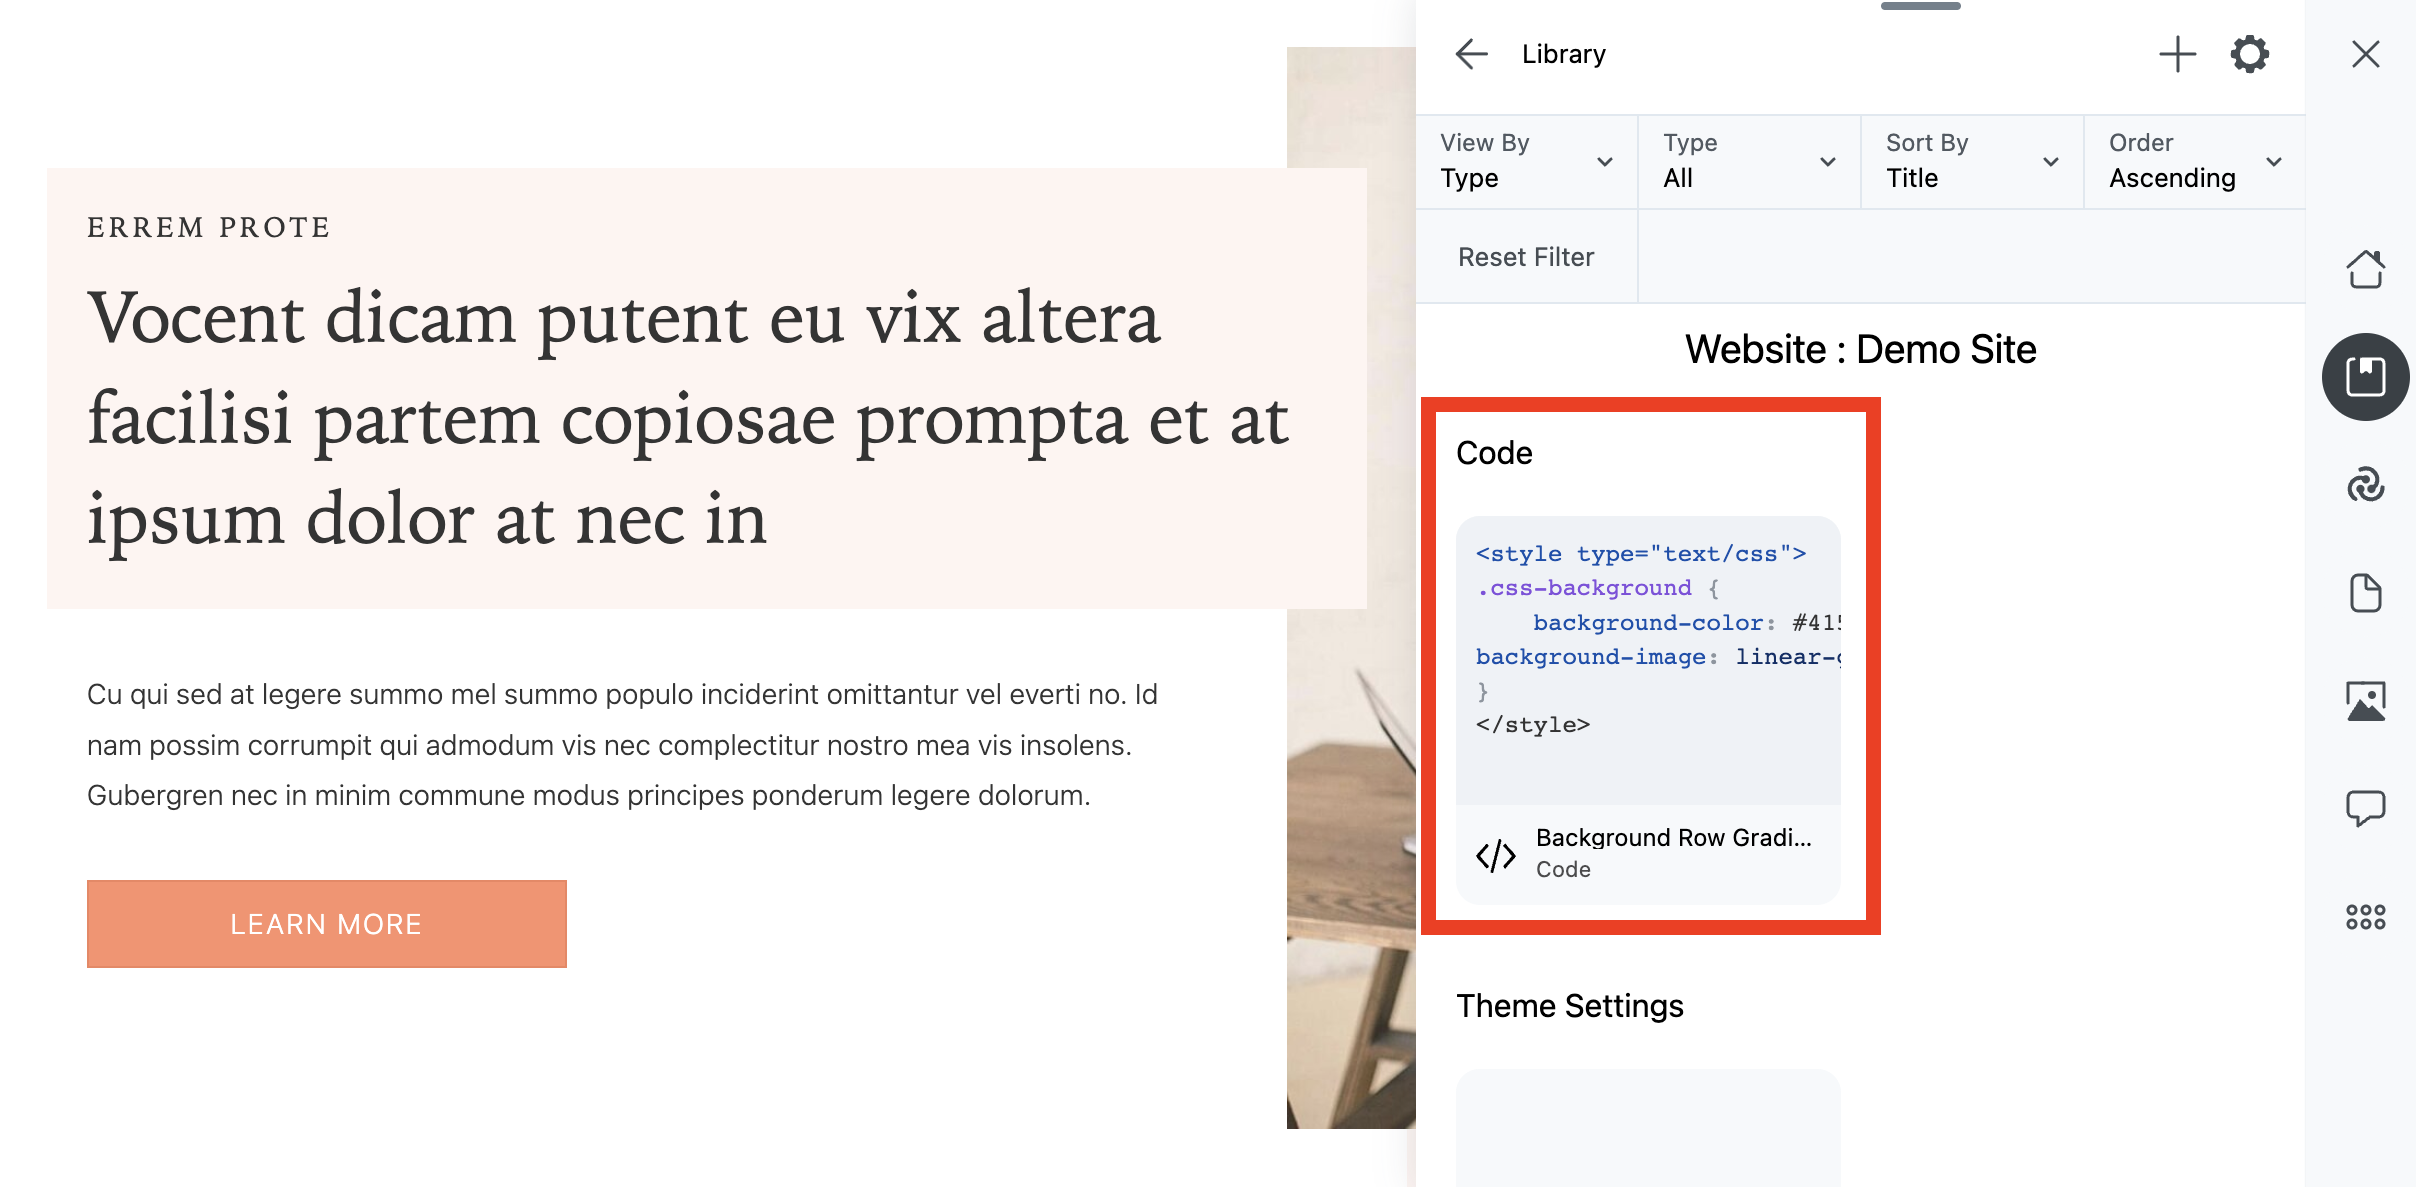
The good news is you no longer have to go searching for your saved code snippets! They are conveniently saved and organized within your Assistant Pro libraries.
To locate your saved code snippets while working on a WordPress site, simply click on the pencil icon to open the Assistant sidebar. Next, click the Libraries app icon. Locate the saved code snippet within the library and click on it:
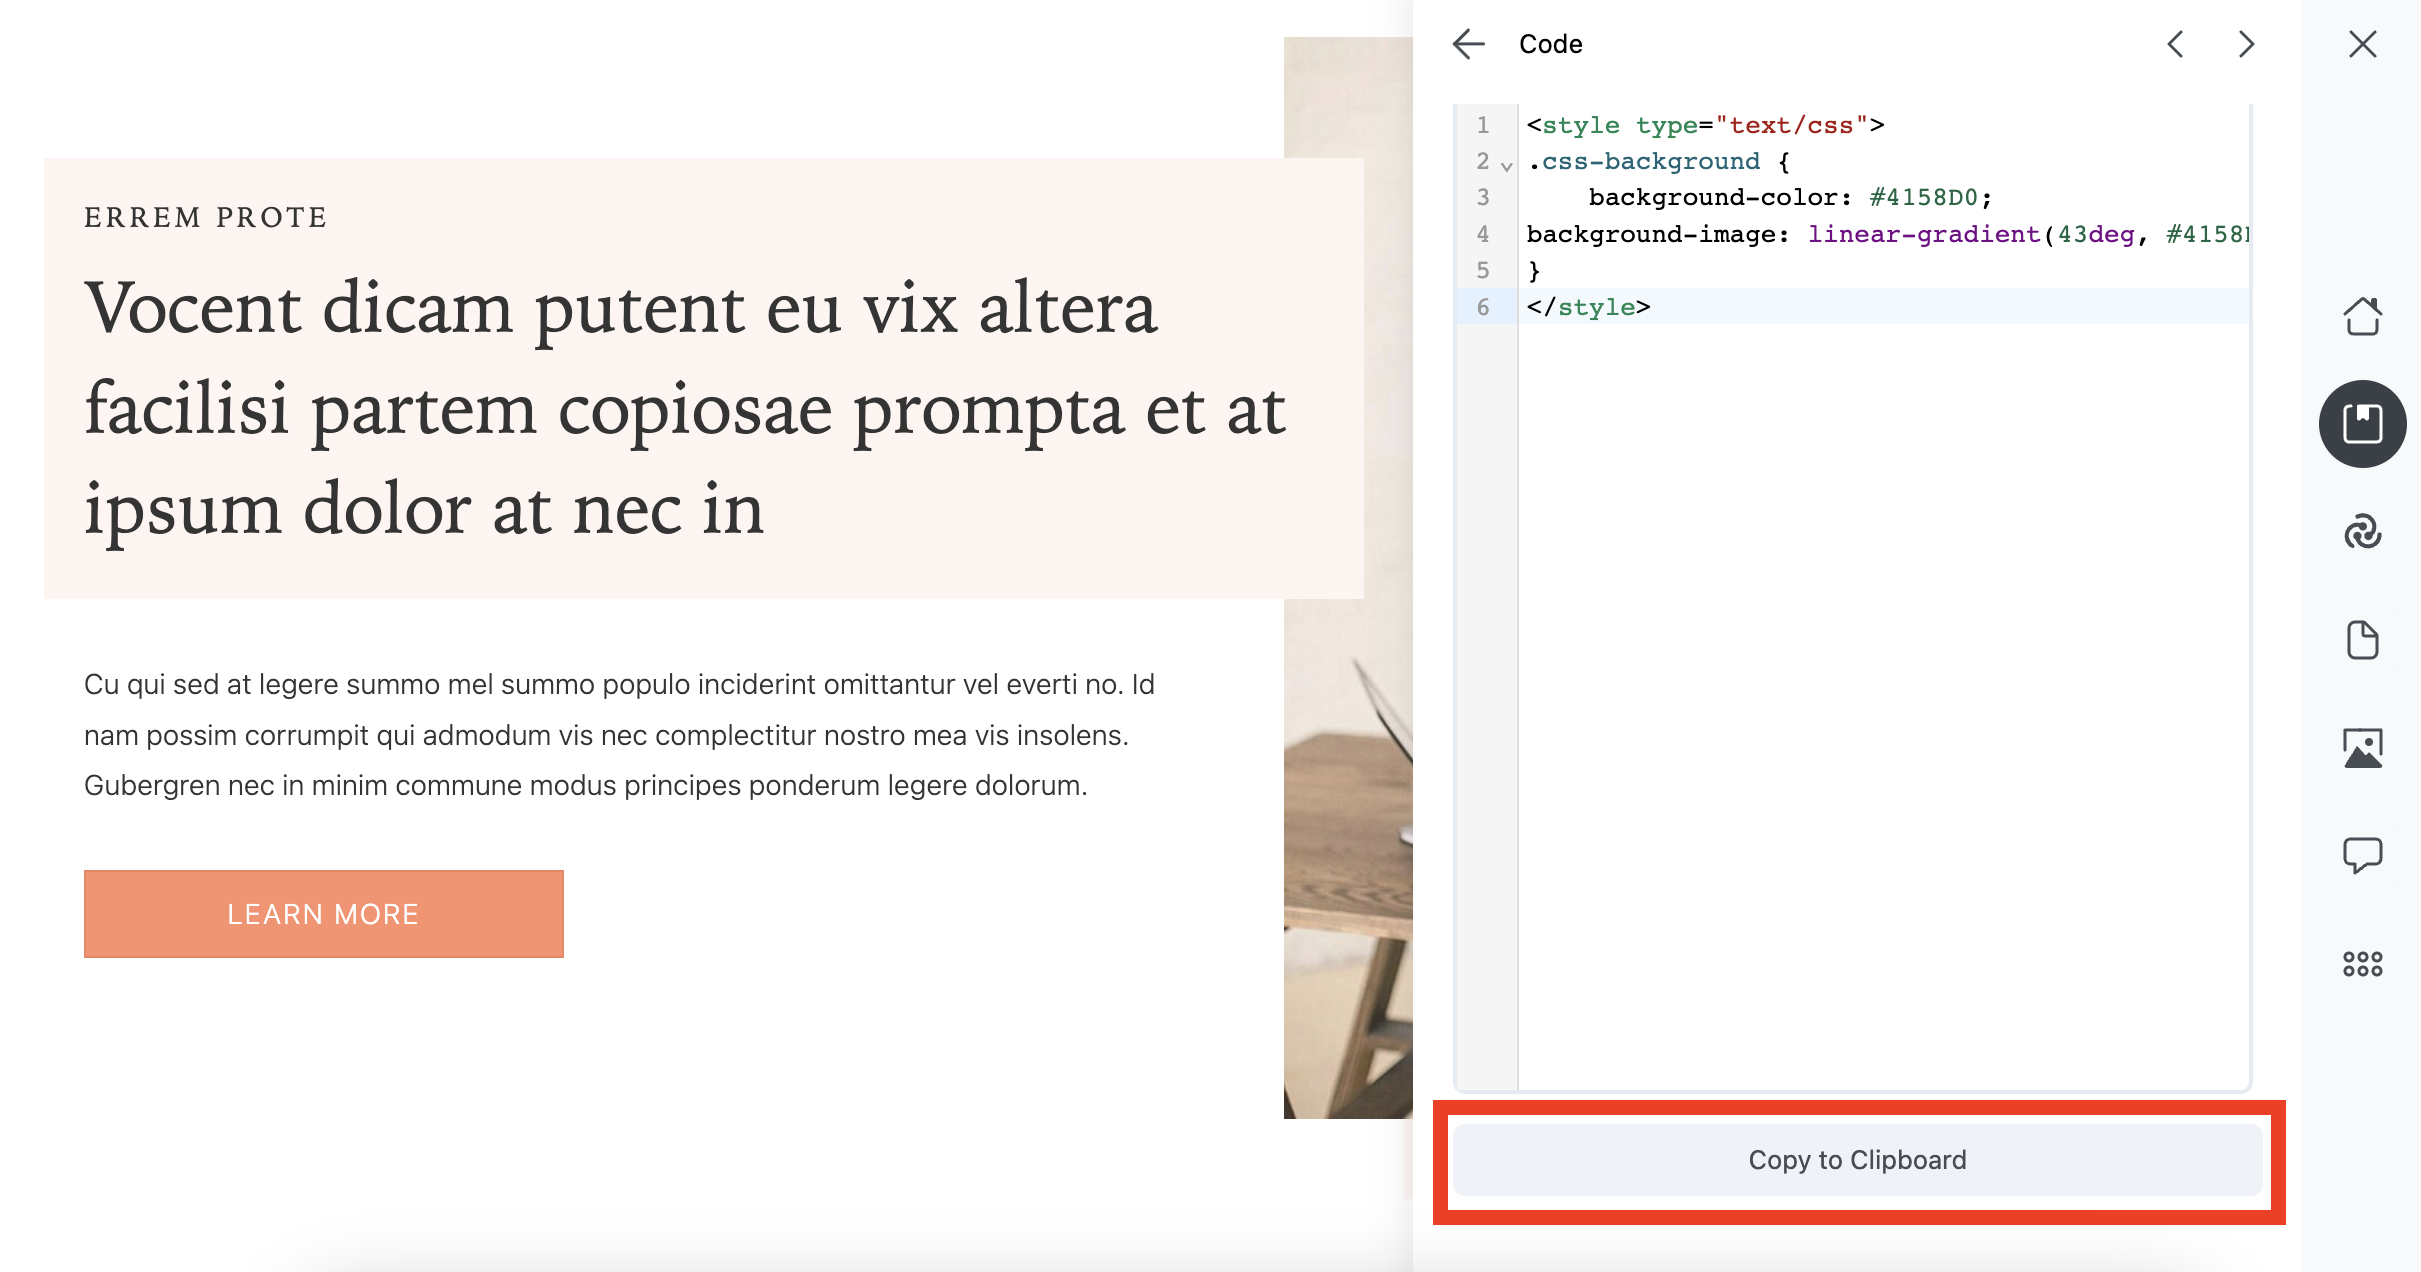
Then, switch to Code Editor, scroll to the bottom of the panel, and hit Copy to Clipboard:
You can upload any kind of media asset in the same way, whether it’s an image, a saved row, or a page layout, and use it on other sites. For example, if you want to import a page layout, open the library where it’s stored, select the template, and hit Import.
You can also import and export specific types of content, such as online courses, product pages, and coupons. This can be very practical if you’re working on multiple projects for a client and want to reuse the same content on different sites. For instance, some clients may have a separate site for their blog, storefront, and memberships.
4. Communicate with Team Members
As we mentioned earlier, you can take full advantage of Assistant Pro by transforming it into a collaborative environment. With the purchase of a Team Plan, it’s easy to create multiple teams in Assistant Pro. Then you will be able to assign, share and restrict access to specific libraries.
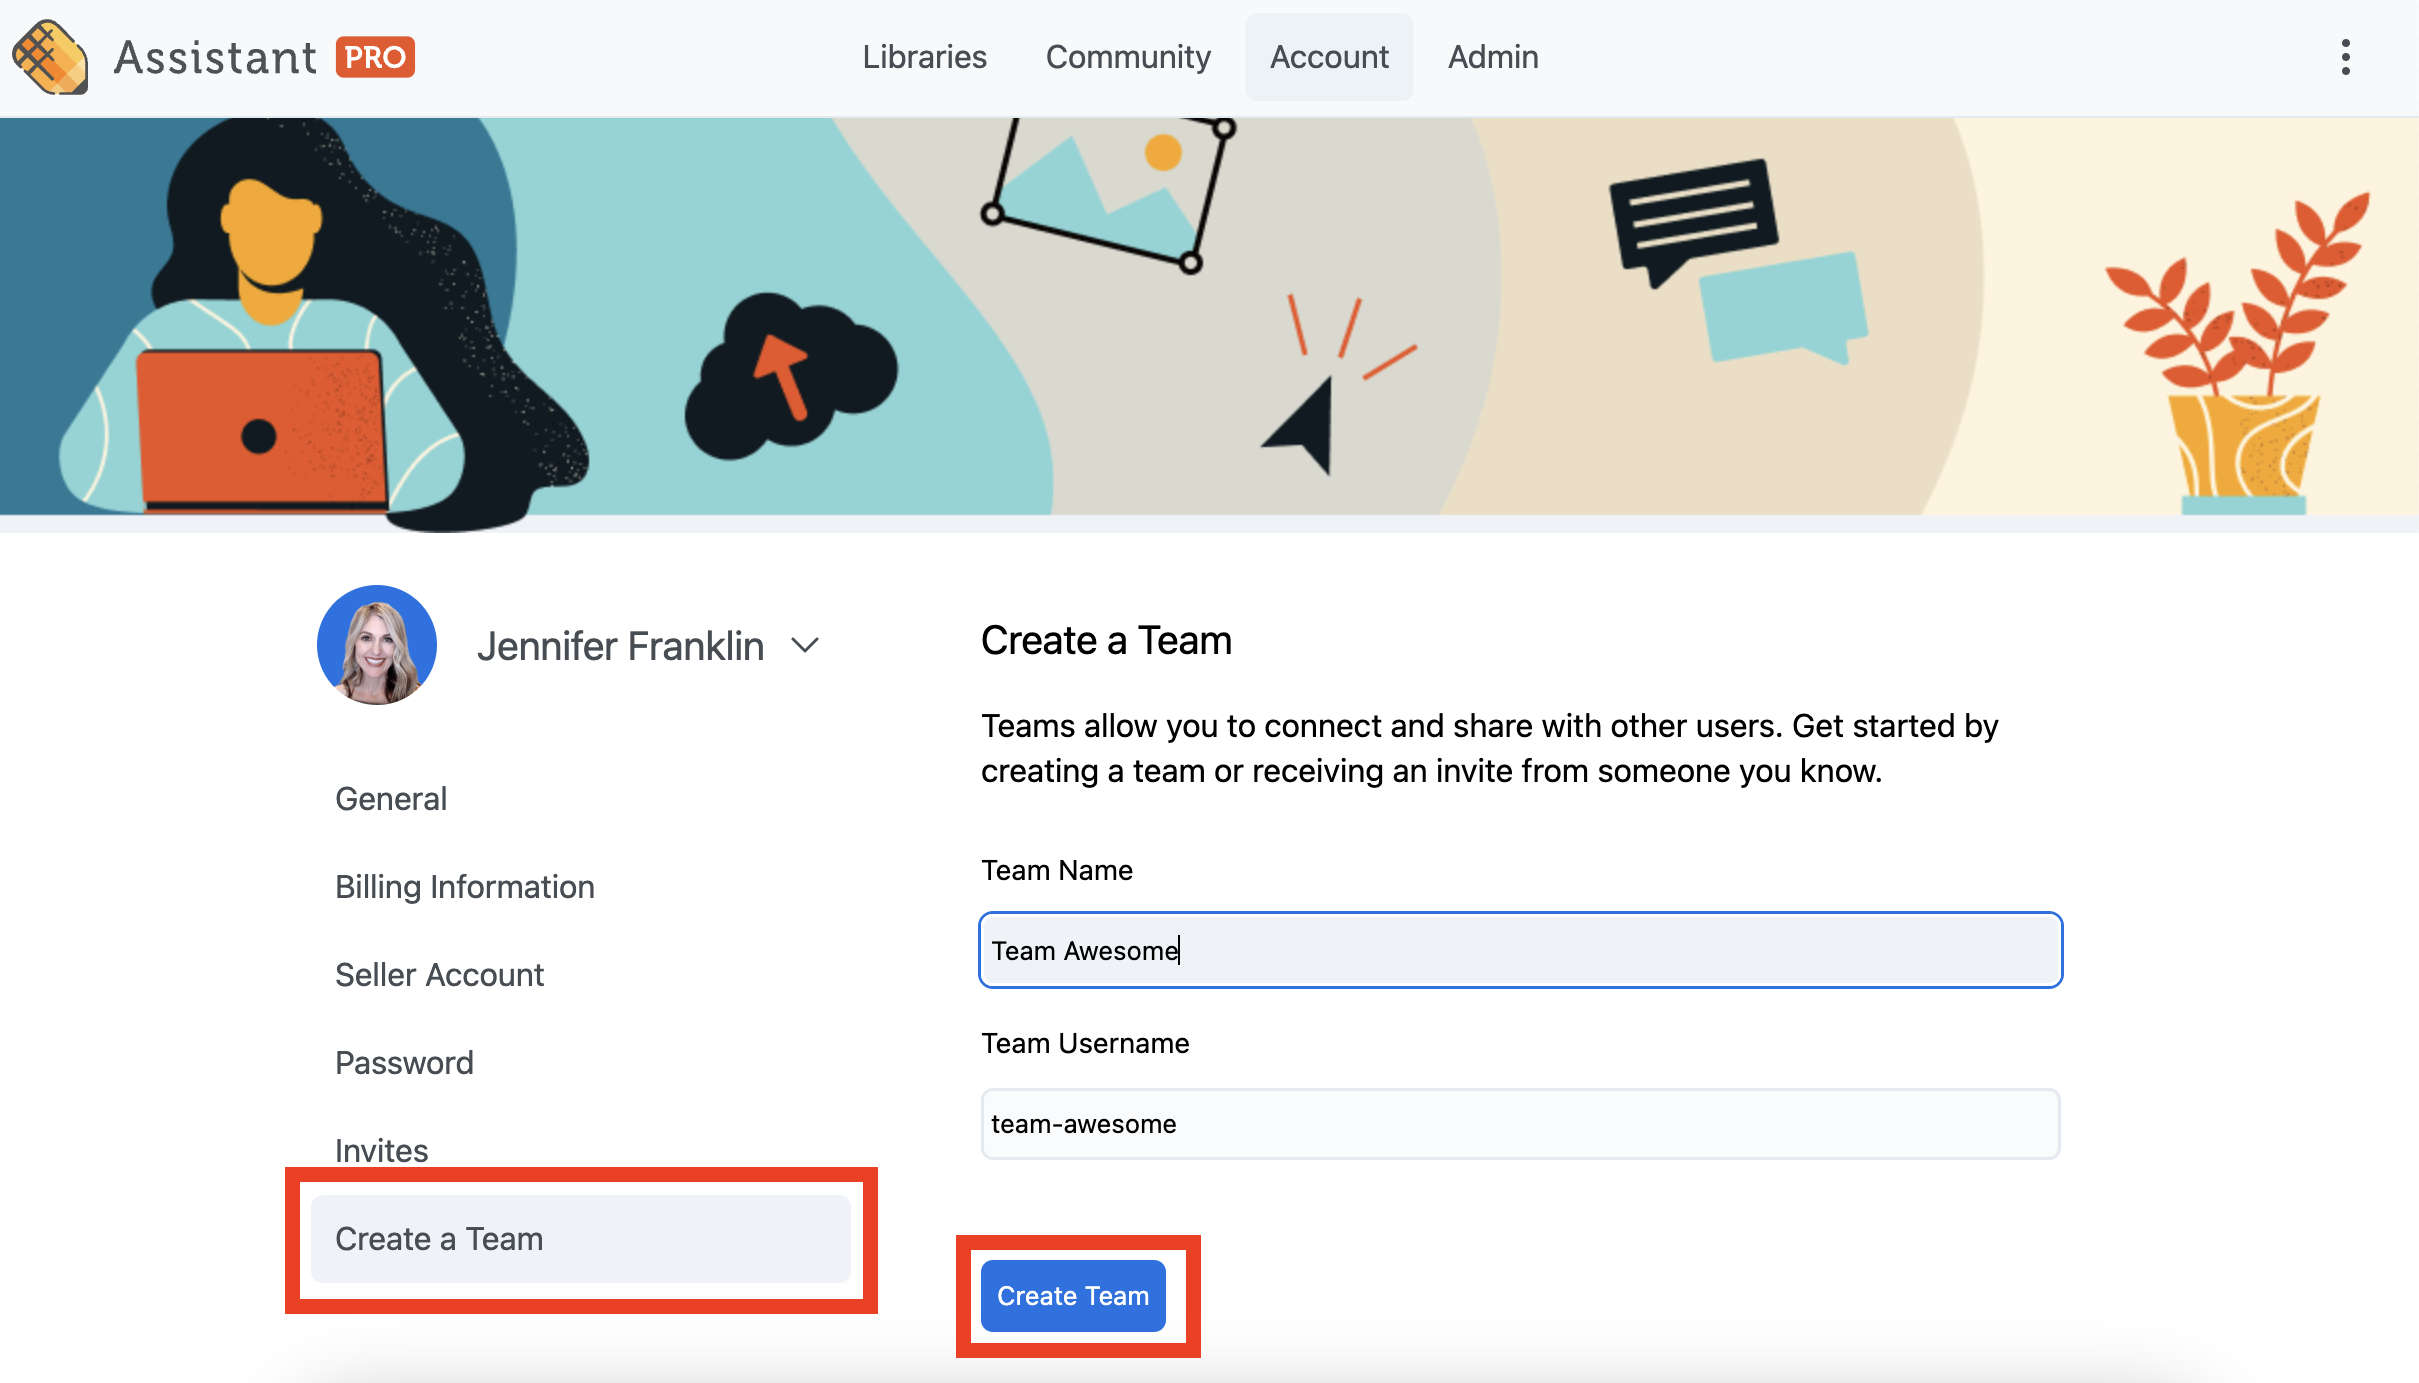
To get started, navigate to the Account page found on the Assistant Pro dashboard. Click on Create a Team.
Choose a team name, and we’ll generate a username for you. Then, click Create Team:
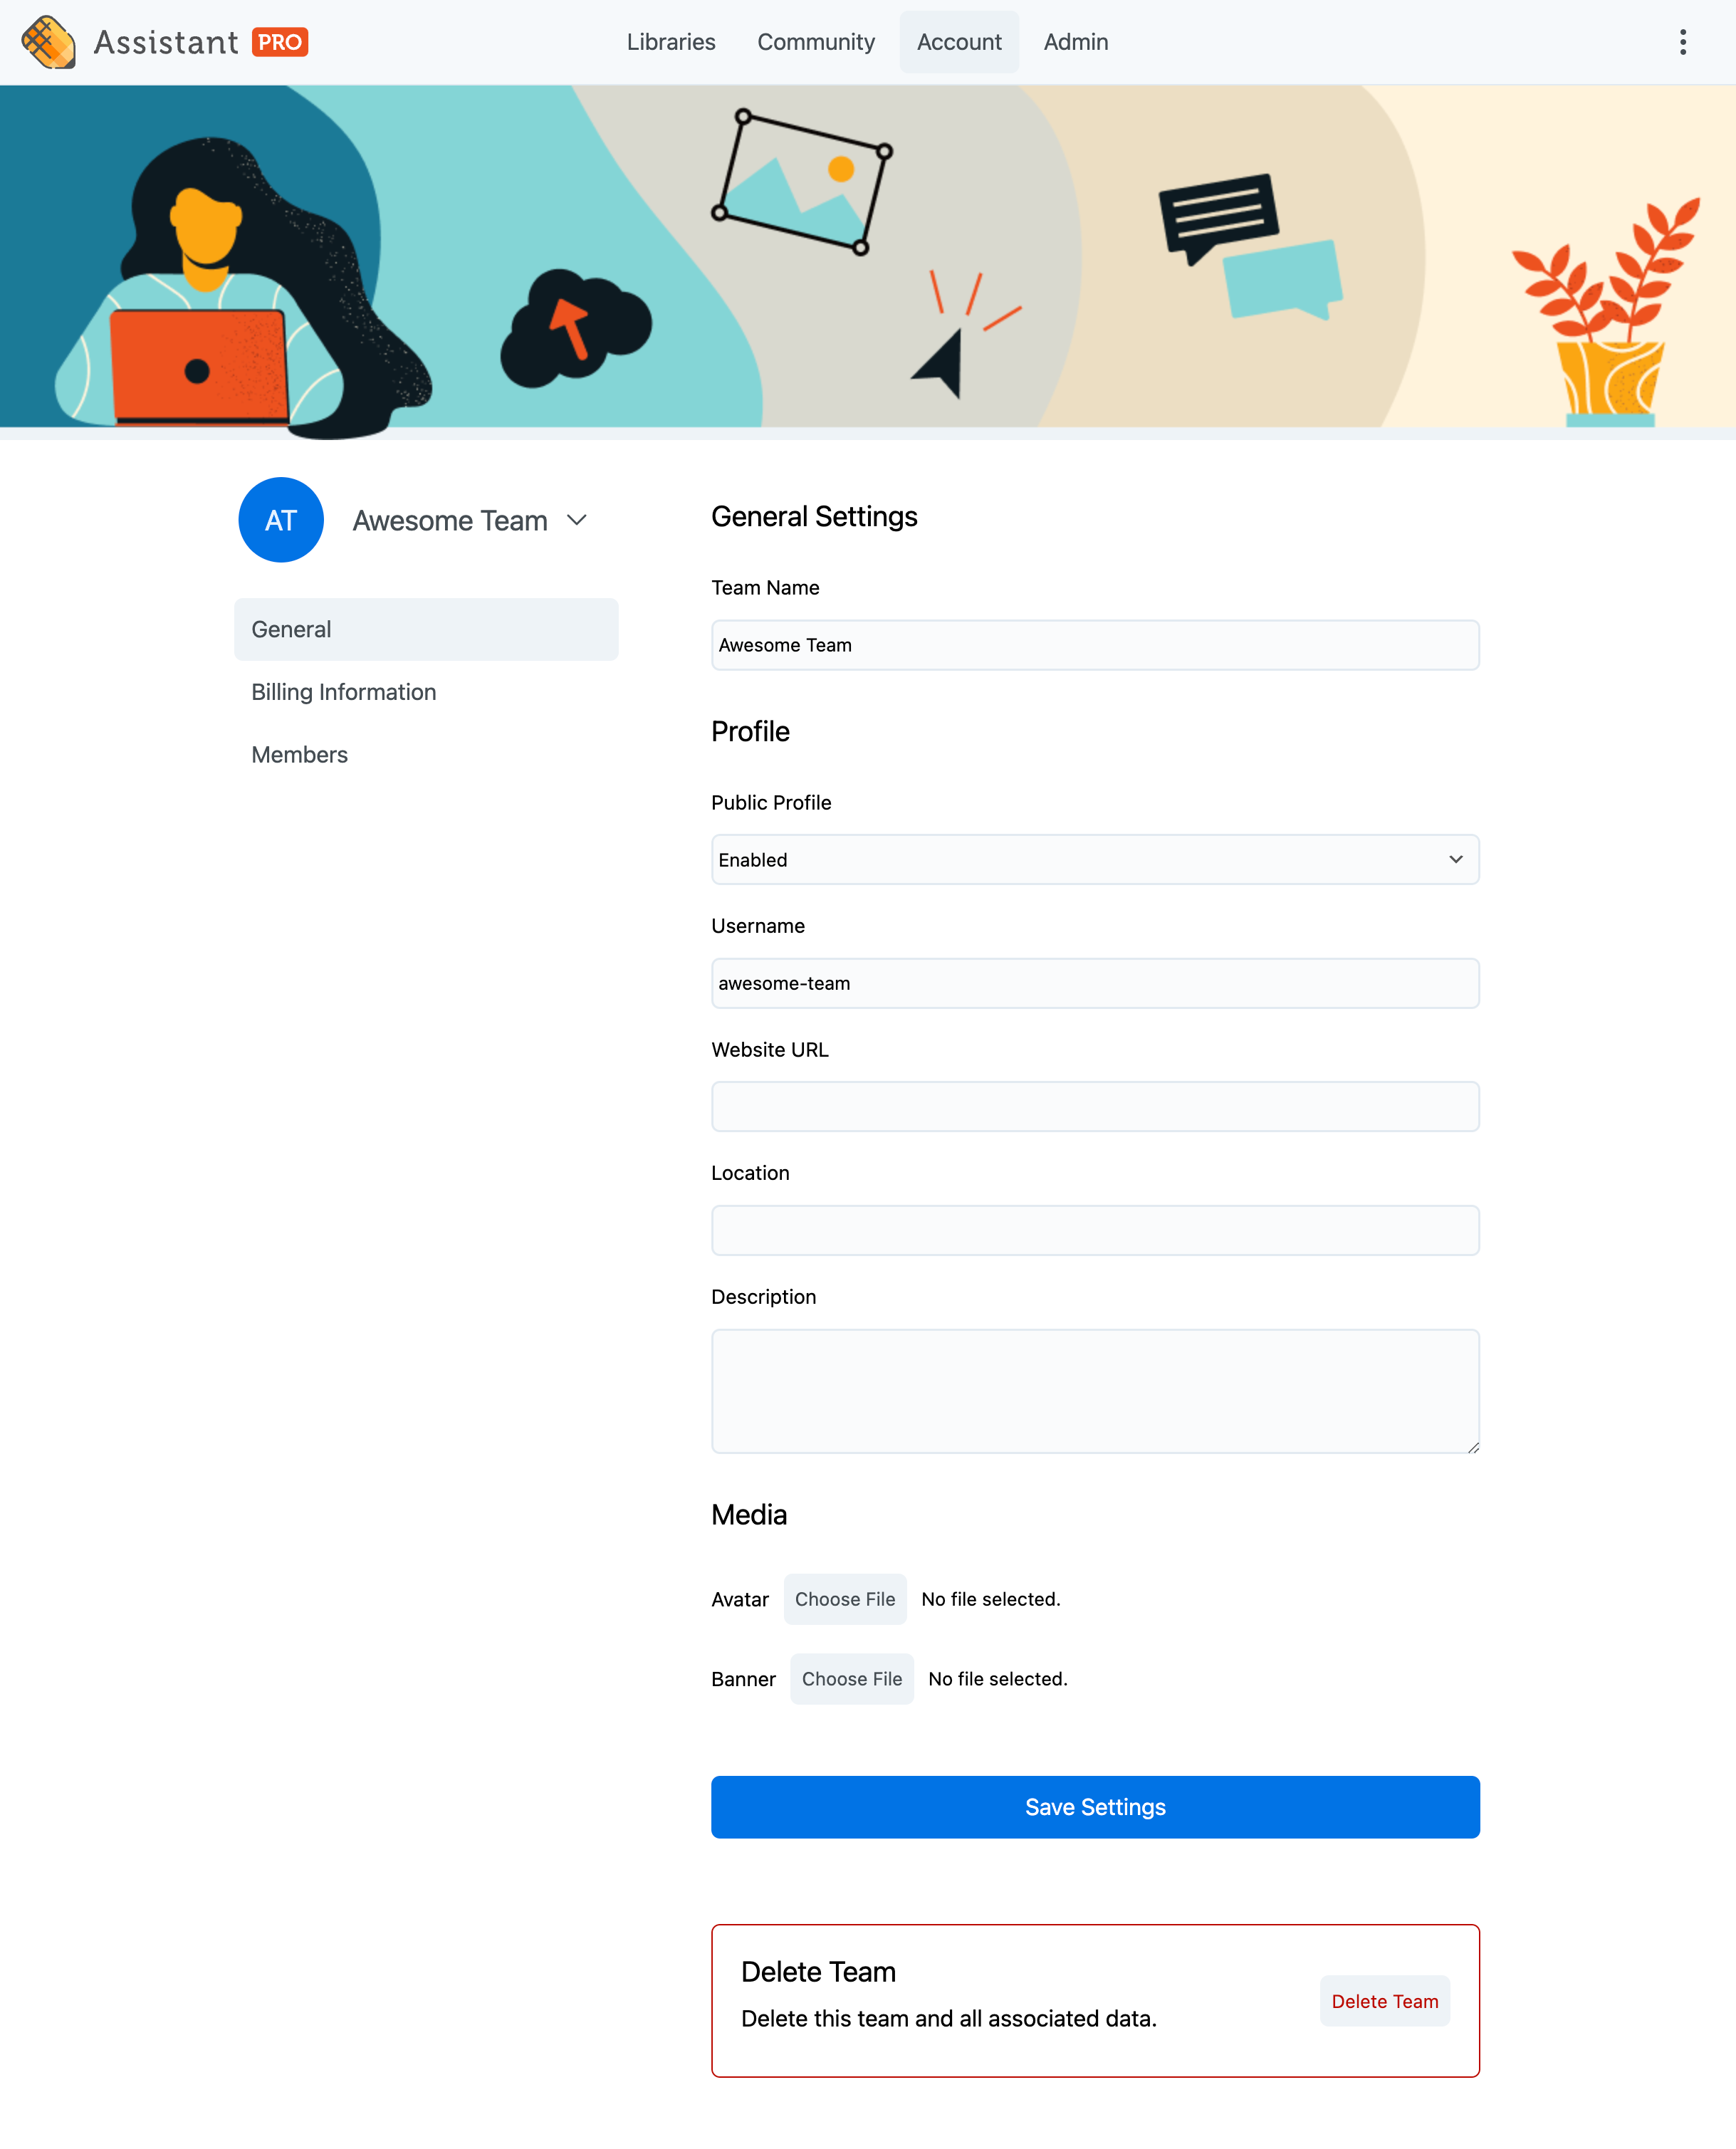
On the General Settings page for your new team account, you can also include a website URL, a team location, a description, and any relevant media files:
In the Members tab, you can send invitations to your colleagues. Plus, you can assign unique access controls for each user, choosing whether to invite members, editors, or admins.
You might also consider creating team libraries. These are more flexible than shared libraries since they can have more than one administrator. Many agencies find team libraries are a great way to organize saved content on a per project basis.
Even if you don’t choose to upgrade to a Team account at this time, you can still communicate with your colleagues through shared libraries. For instance, you can share creative assets with them so they can give you feedback and suggestions.
Conclusion
As an agency, it’s important that you have a simple and effective method of storing and sharing files. With Assistant Pro, you can create organized libraries to save and share content. Plus, you can manage group projects more efficiently to boost your productivity.
To recap, here are four ways that agencies can benefit from using Assistant Pro:
- Organize WordPress content into libraries.
- Save WordPress theme settings.
- Store and transfer creative assets.
- Communicate with team members.
Related Questions
What Kind of Assets Can I Upload to the Assistant Pro Libraries?
You can upload any WordPress content that is saved as a post type to Assistant Pro. This includes items such as:
- full-page templates
- template parts
- pages,
- posts
- theme customizer settings
- image files
- PDF files
- rich text documents
- color codes.
The file types currently supported are jpg, png, gif, and SVG.
How Many User Accounts Are Included with My Assistant Pro Subscription?
The number of user accounts depends on your Assistant Pro subscription (Free, Personal, or Team). The Free and Personal plans offer one user account, and Team offers three user accounts. You can add more users at $5 per month each.