How to Sell Web Design Templates With Assistant Pro (In 4 Steps)

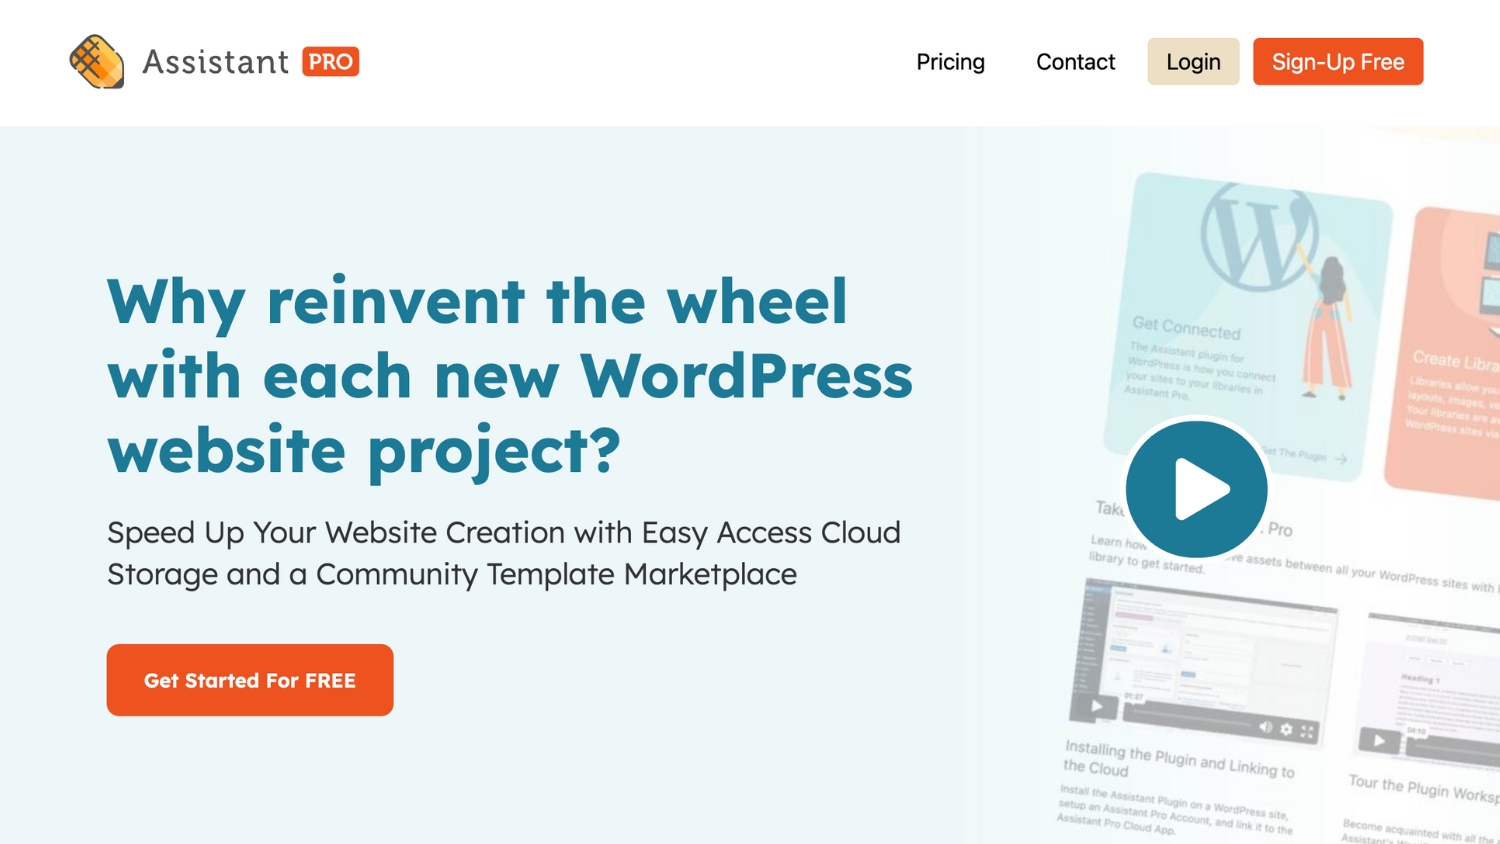
Are you a WordPress developer or designer searching for a hassle-free way to sell your web design templates?
The Assistant Pro Community is a brand new marketplace where you can buy and sell page builder templates and other WordPress web design assets. Buyers get access to hundreds of expertly-crafted premium templates and sellers earn a commission on sales
In this article, we’ll explain why you might want to sell your design libraries in Assistant Pro. Then, we’ll show you how to do this in four simple steps. Let’s get started!
Table of Contents:
- Why You Might Want to Sell Libraries in Assistant Pro
- How to Sell Designs with Assistant Pro (In 4 Steps)
- Step 1: Sign Up for an Assistant Pro Account
- Step 2: Apply to Become a Seller
- Step 3: Connect Your Stripe Account
- Step 4: Create and List Libraries for Sale in the Community Marketplace
- Conclusion
- Related Questions
Why You Might Want to Sell Libraries in Assistant Pro
As a WordPress developer or designer, you may be wondering how to earn passive income from your designs.
At Assistant Pro, we’ve developed a platform that makes it easy to save and organize different design assets into cloud-based libraries. These libraries can contain anything from page templates to code snippets:
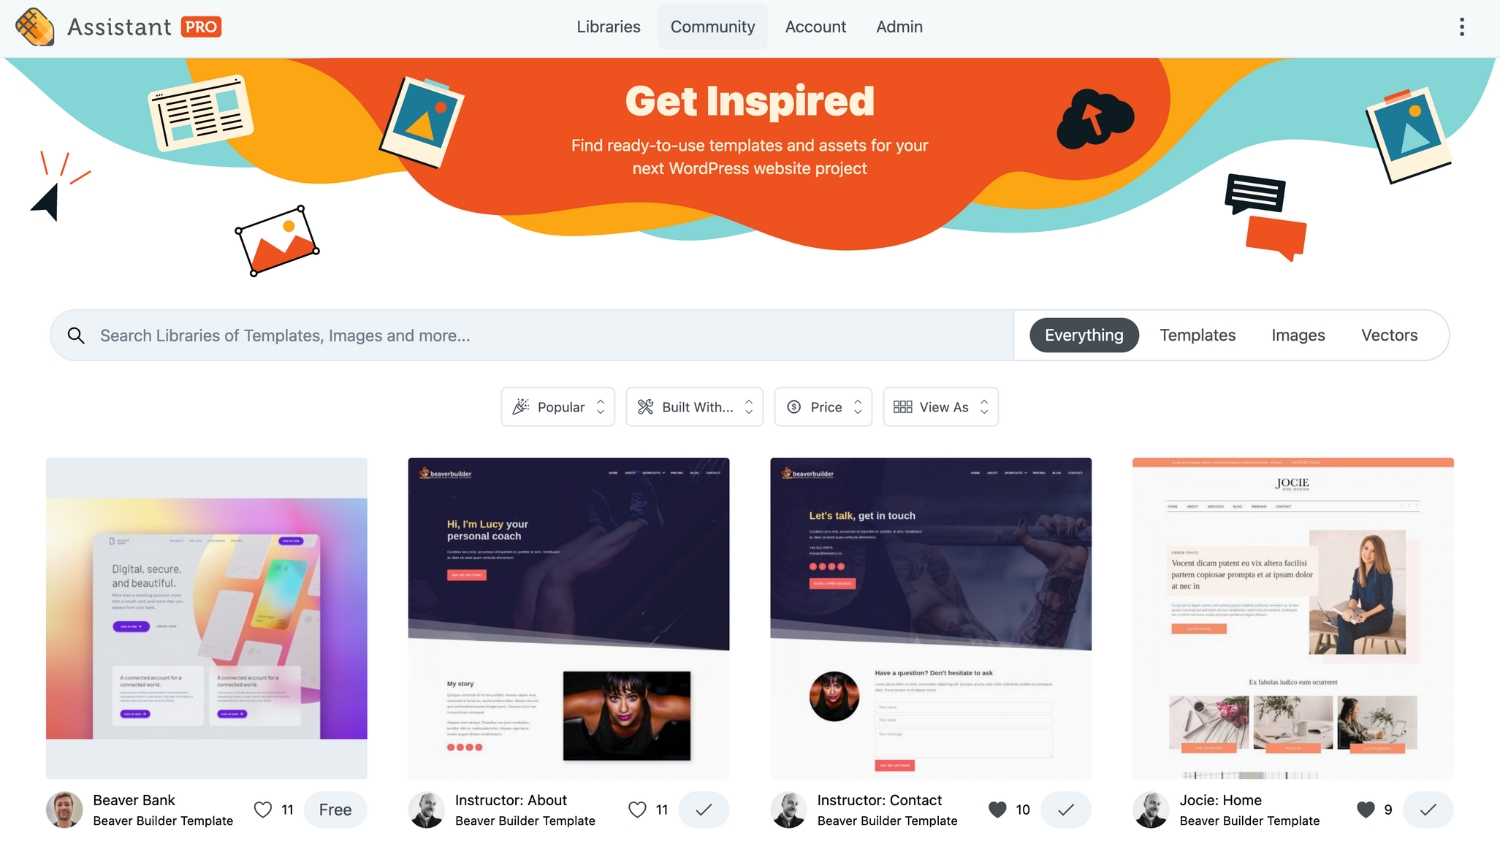
Our new Community feature lets you easily list your libraries in the marketplace. After you become a seller, Assistant Pro users can purchase your custom layout templates, images, and vectors:
Here are some additional benefits of selling designs in the Assistant Pro Community:
- Set custom prices.
- Earn high commissions.
- Access to an easy payout system.
- Become a featured seller.
- Avoid exclusivity lock-ins.
Unlike other marketplaces, you’ll be able to promote your designs directly to WordPress users. After a simple application process, you can start selling custom headers, footers, logos, and other valuable website assets.
How to Sell Designs with Assistant Pro (In 4 Steps)
Here’s how to list design libraries for sale in the Assistant Pro Community:
Step 1: Sign Up for an Assistant Pro Account
First, you’ll need to create an Assistant Pro account if you don’t already have one. Although we offer a free plan, choosing this option will make all of your libraries free and publicly available in the Community marketplace.
In order to start selling designs, you will need to upgrade to a premium account:
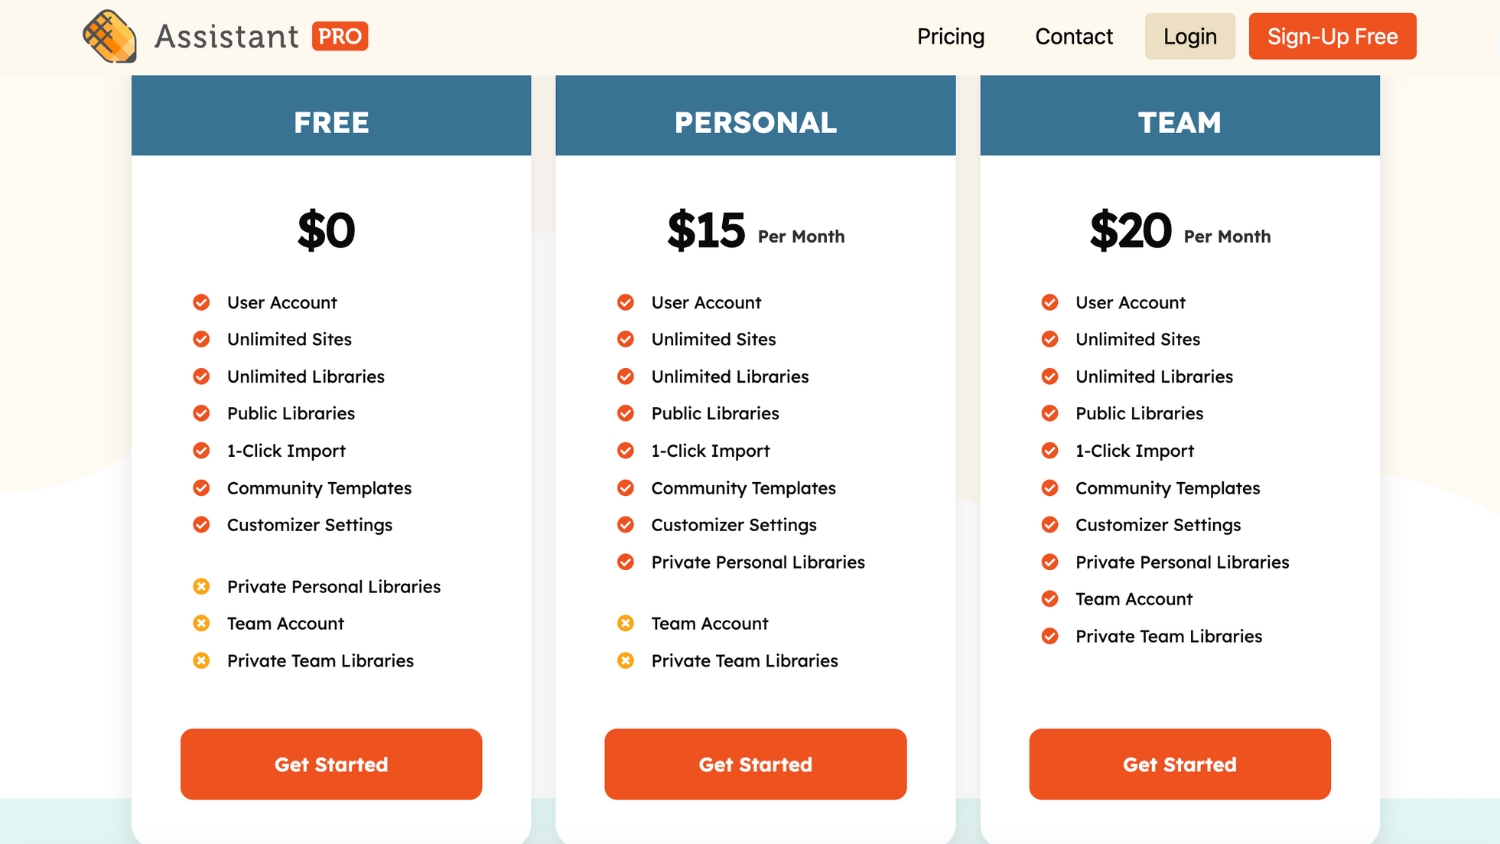
With either our Personal or Team subscriptions, you’ll be able to create both public and private libraries. Plus, you can set a custom price for any public library. However, keep in mind that you can only buy and sell personal libraries, not Team ones.
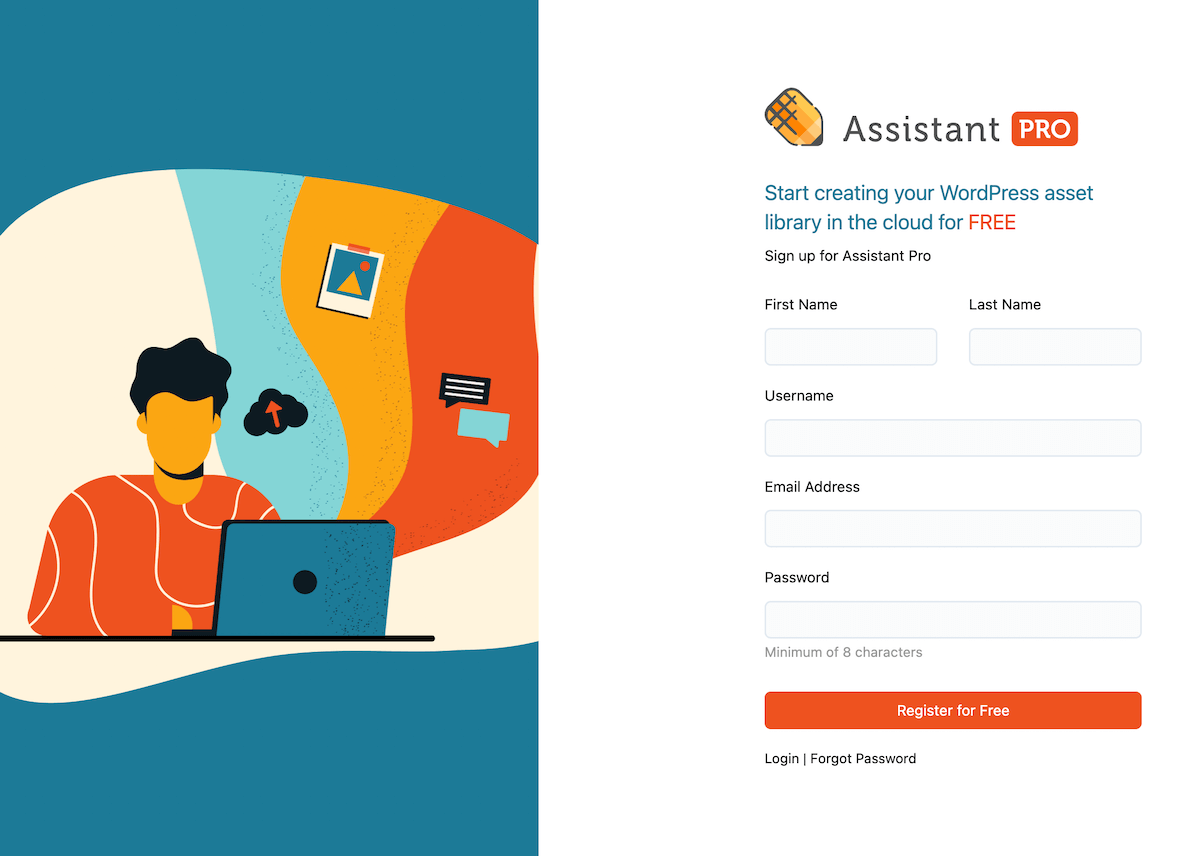
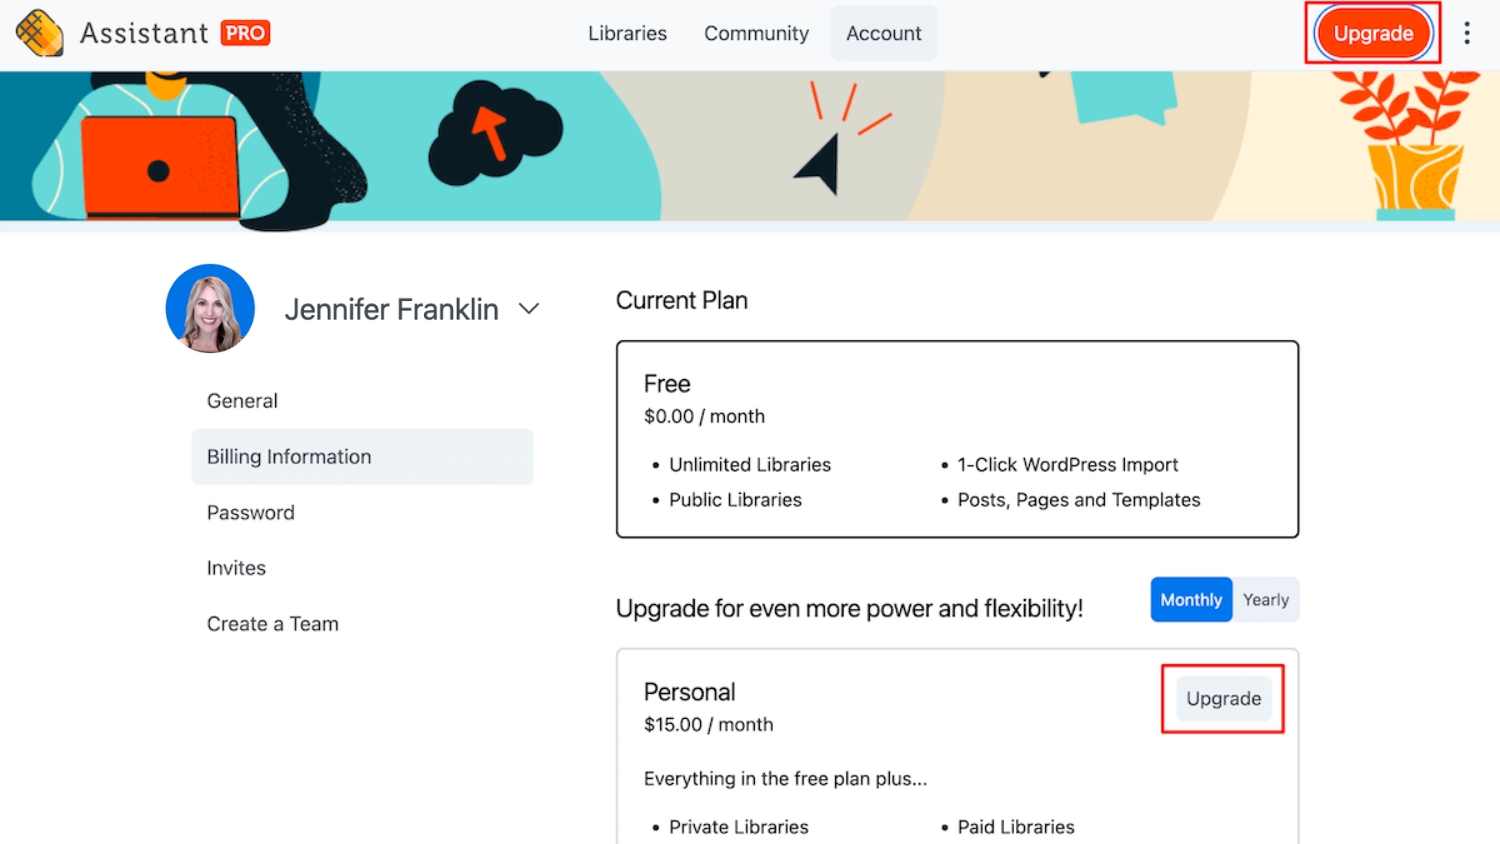
Once you’ve chosen a plan that meets your needs, click on Get Started. Then, enter your first name, last name, username, email address, and password to register:
Alternatively, you can always upgrade your free account. Simply hit the Upgrade button in the top-right corner of your dashboard and choose a new plan:
Now you’re ready to start using Assistant Pro!
Step 2: Apply to Become a Seller
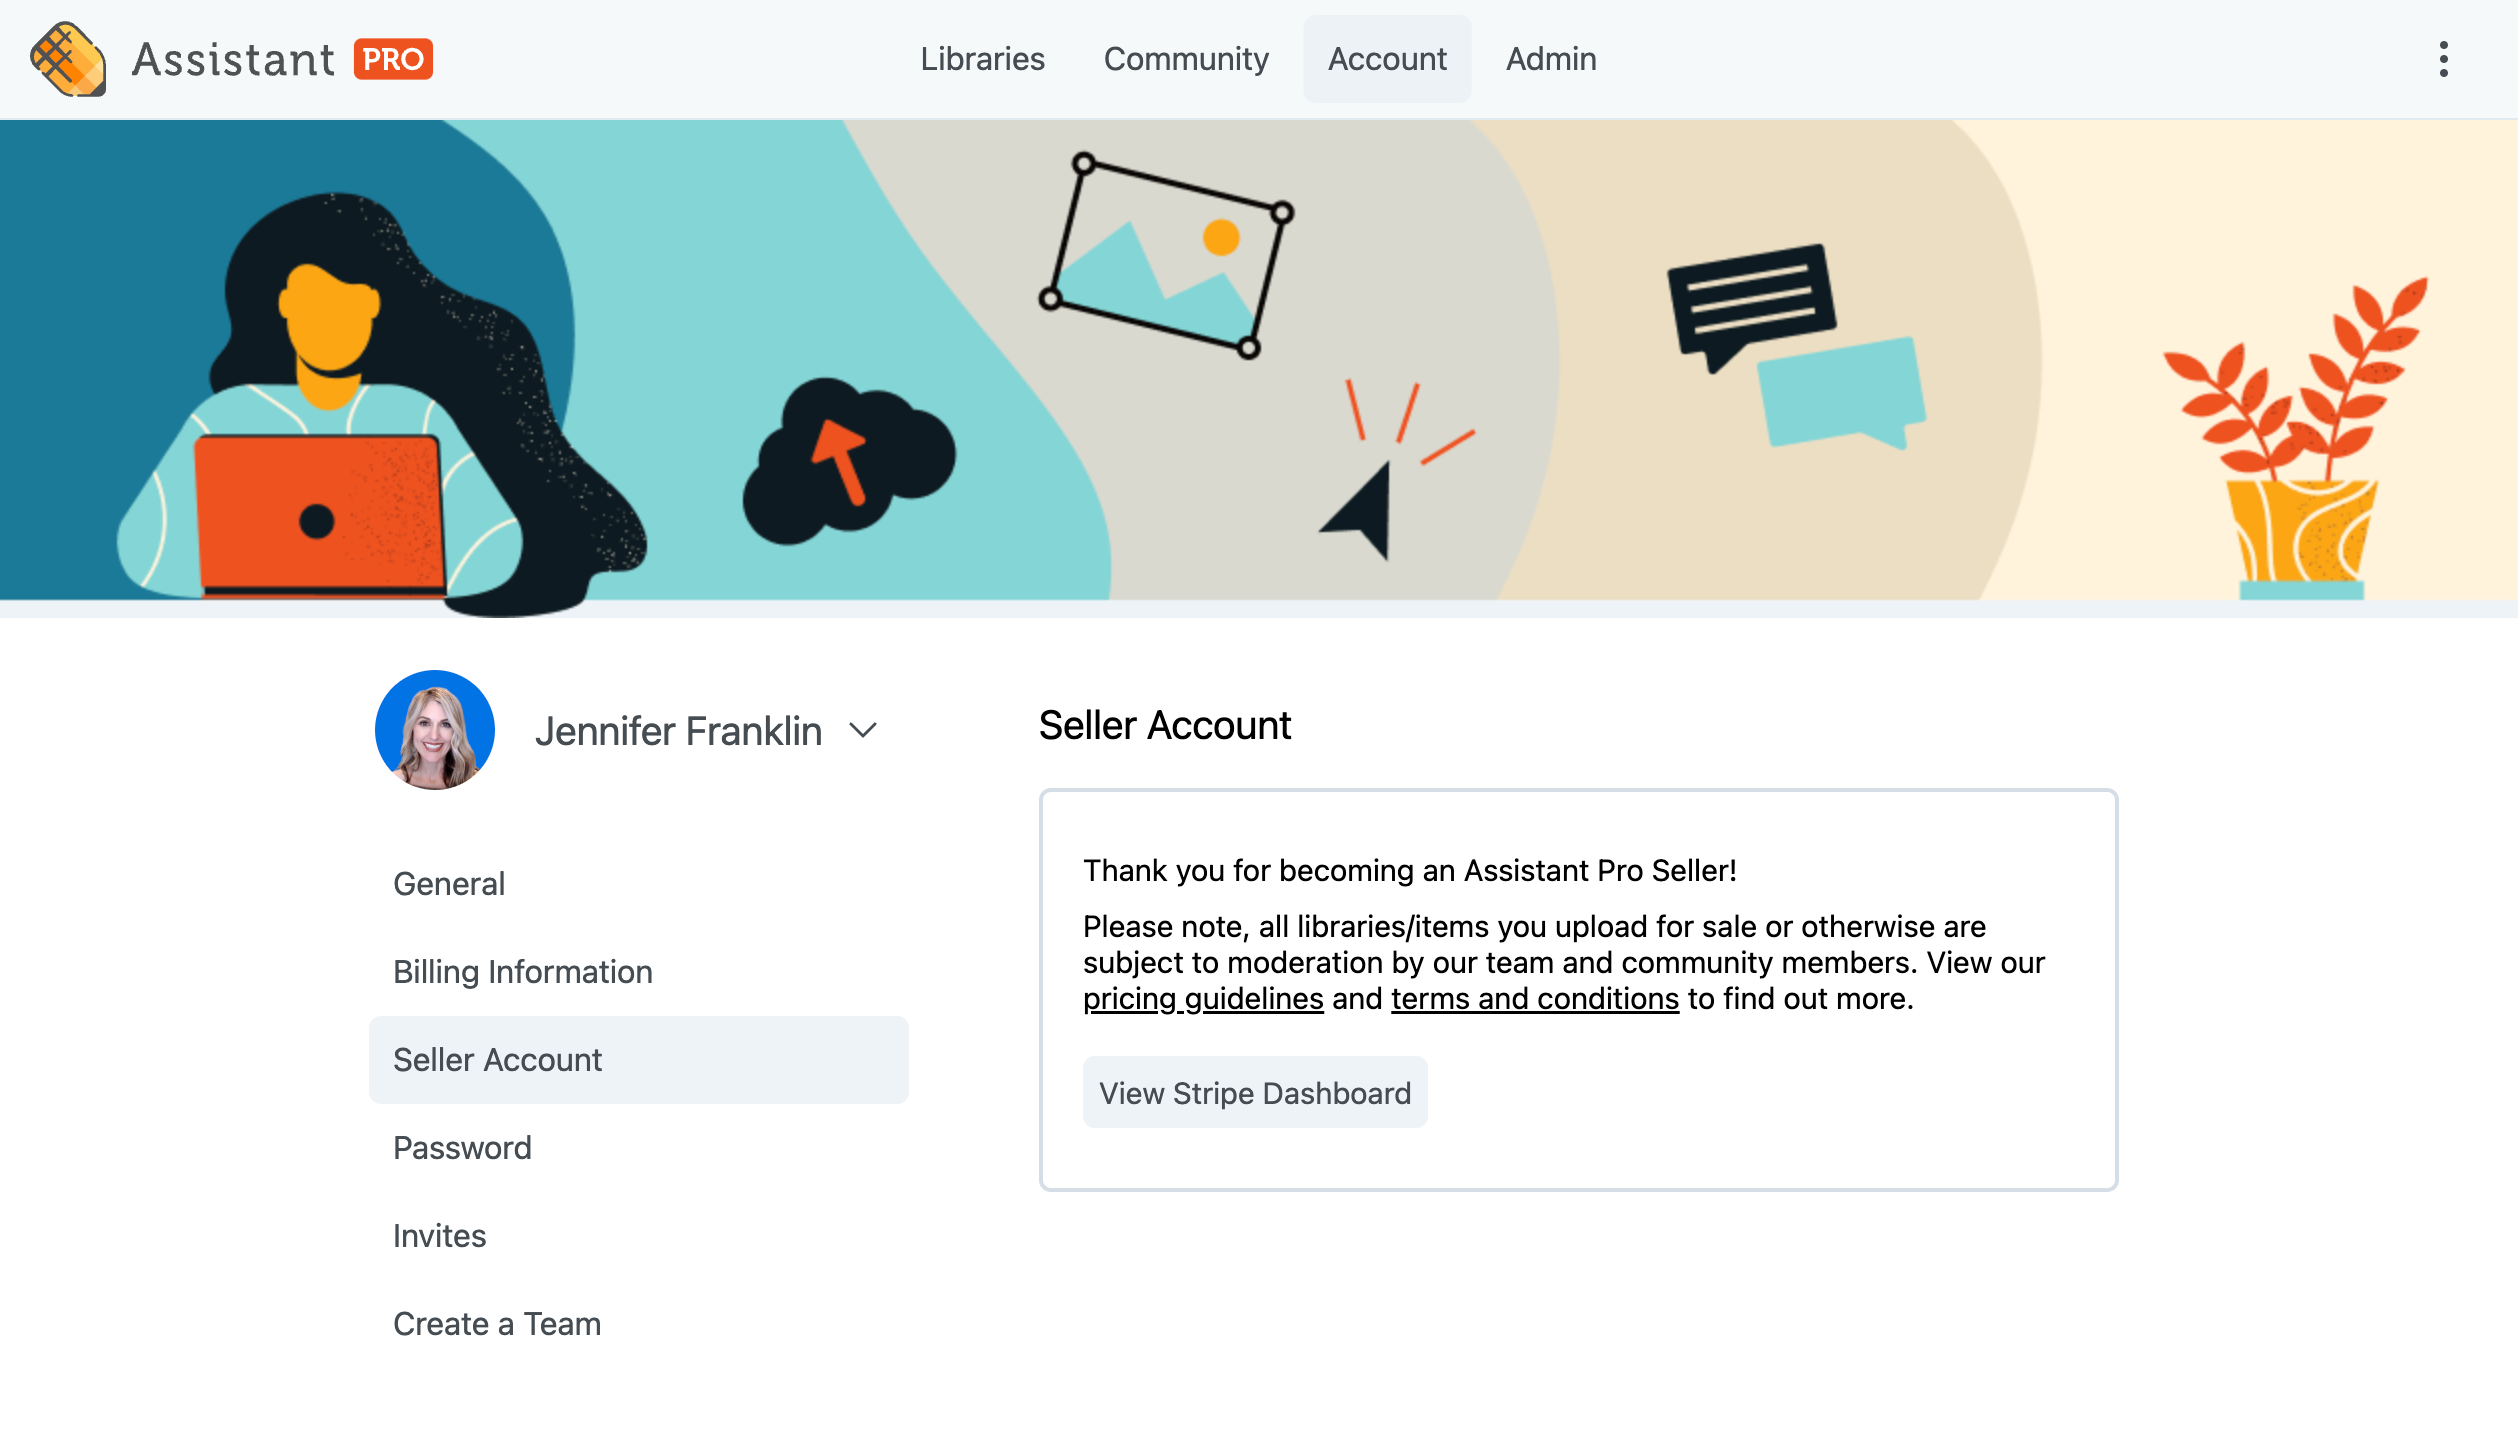
After creating an Assistant Pro account, it’s time to start selling. To do this, you’ll first have to apply to become a seller. On your dashboard, navigate to Account > Seller Account:
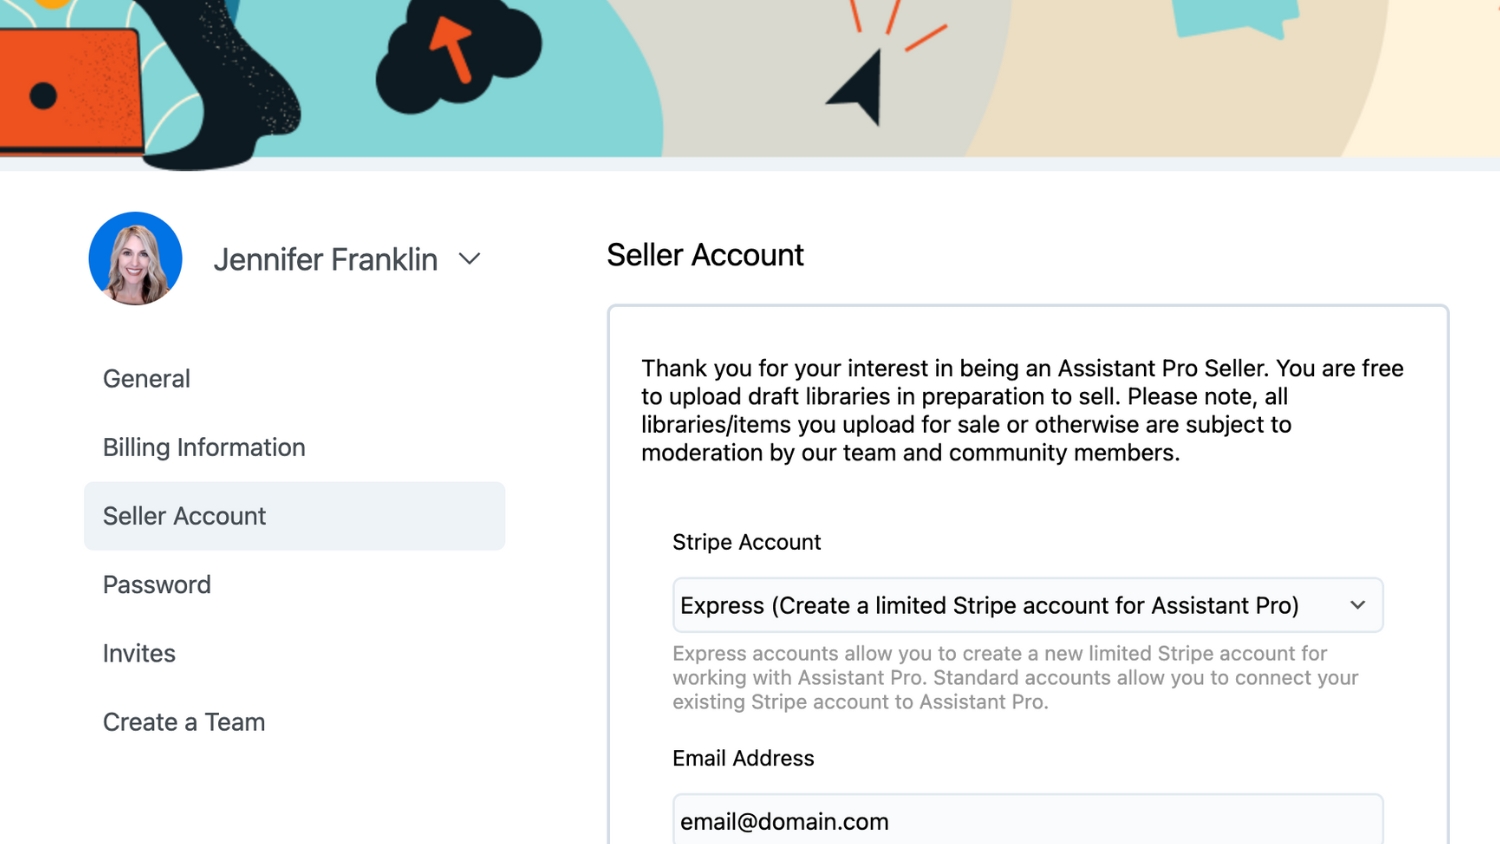
On this page, you’ll see an application form. You can choose to set up either an Express or Standard Stripe account. Express accounts allow you to create a new limited Stripe account specifically for Assistant Pro transactions. Standard accounts allow you to connect your existing Stripe account to Assistant Pro. Users located outside the United States must create a Standard account.
Next, enter an email address that sellers can use to contact you. Scroll down and add the country, city, and state where you live.
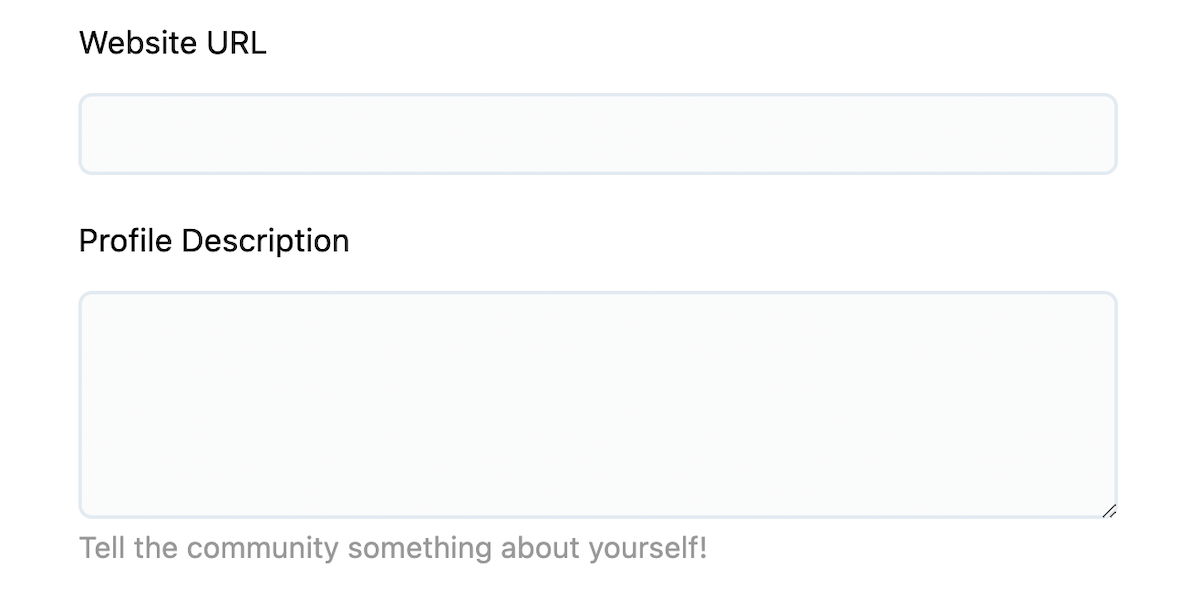
Then, paste the URL to your business website. You can also add a description to your seller profile. This will introduce you and your work to the Community:
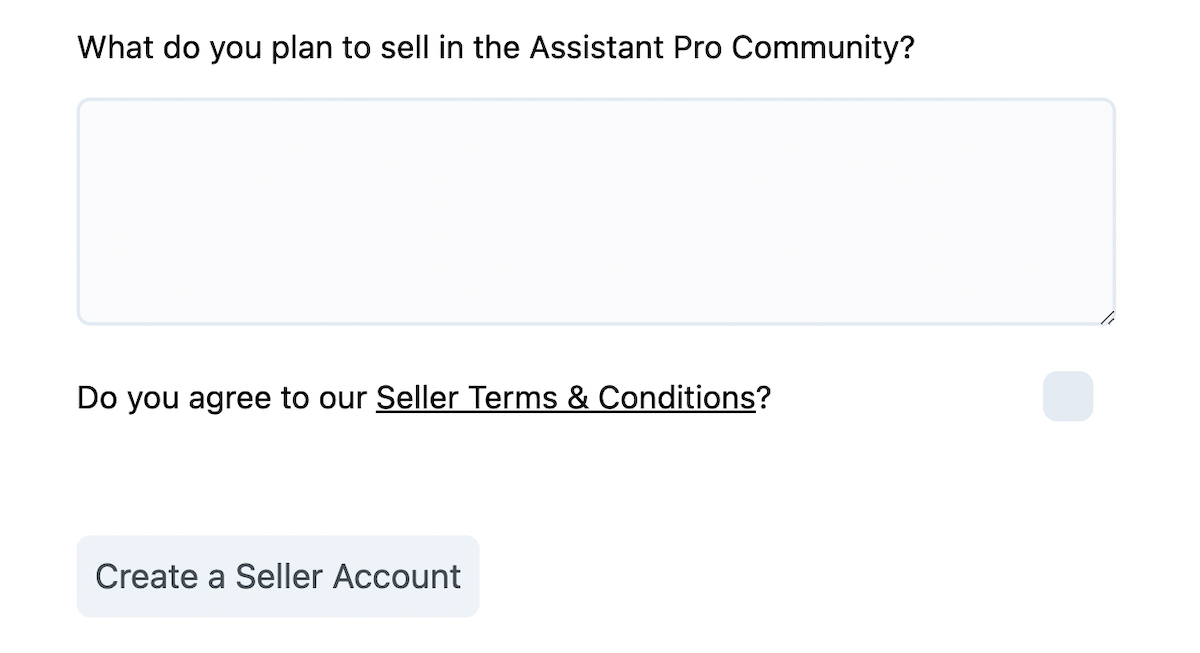
Finally, describe the type of content you plan to sell:
Here are just a few creative assets you can list in Assistant Pro:
- Landing pages and home pages
- Starter sites
- Headers and footers
- Contact forms
- Pricing tables
- Testimonials
- Logos
To complete your application, agree to the terms and conditions. Then, hit Create a Seller Account.
Step 3: Connect Your Stripe Account
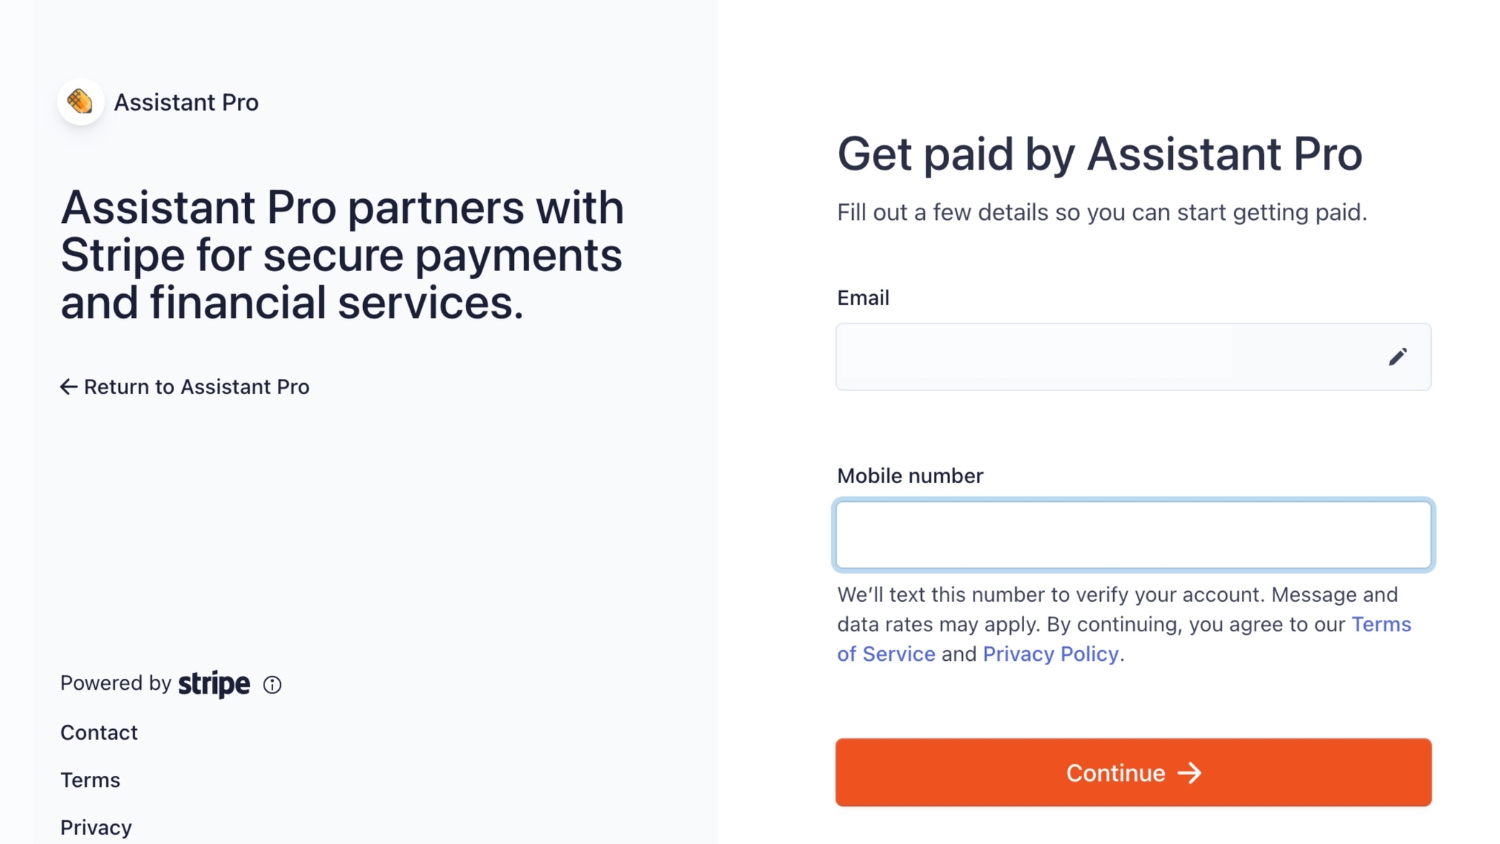
Next, Assistant Pro will ask you to connect to Stripe. This payment platform ensures that all your sales are secure transactions.
After submitting your Seller application, enter an email address and mobile phone number for your Stripe account:
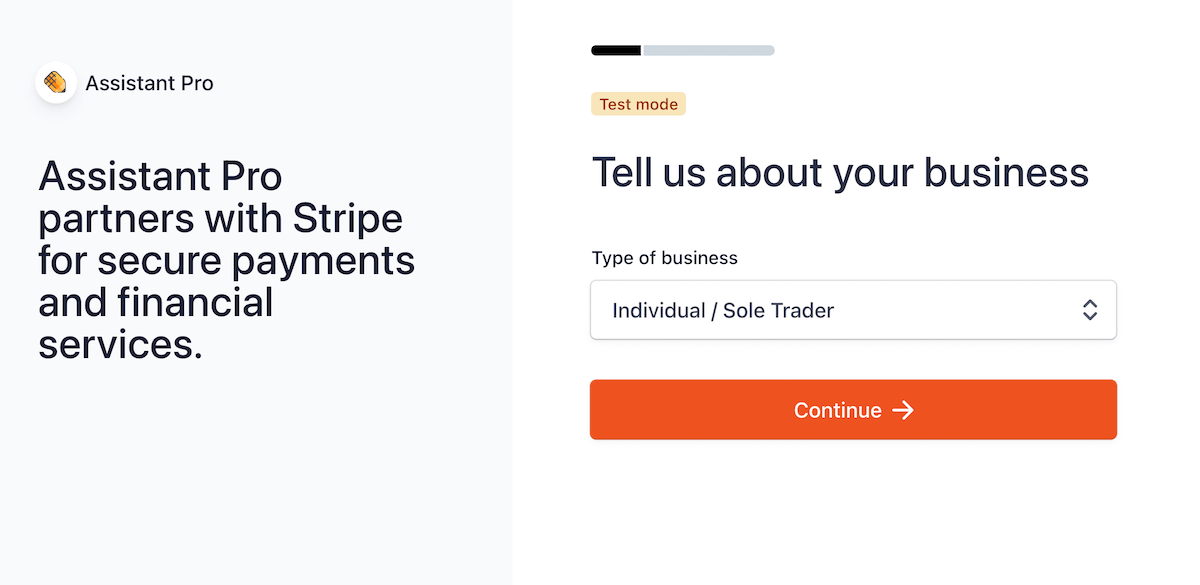
You’ll have to confirm your phone number with a verification code. Then, tell Stripe whether you’re a freelancer, company, or non-profit organization:
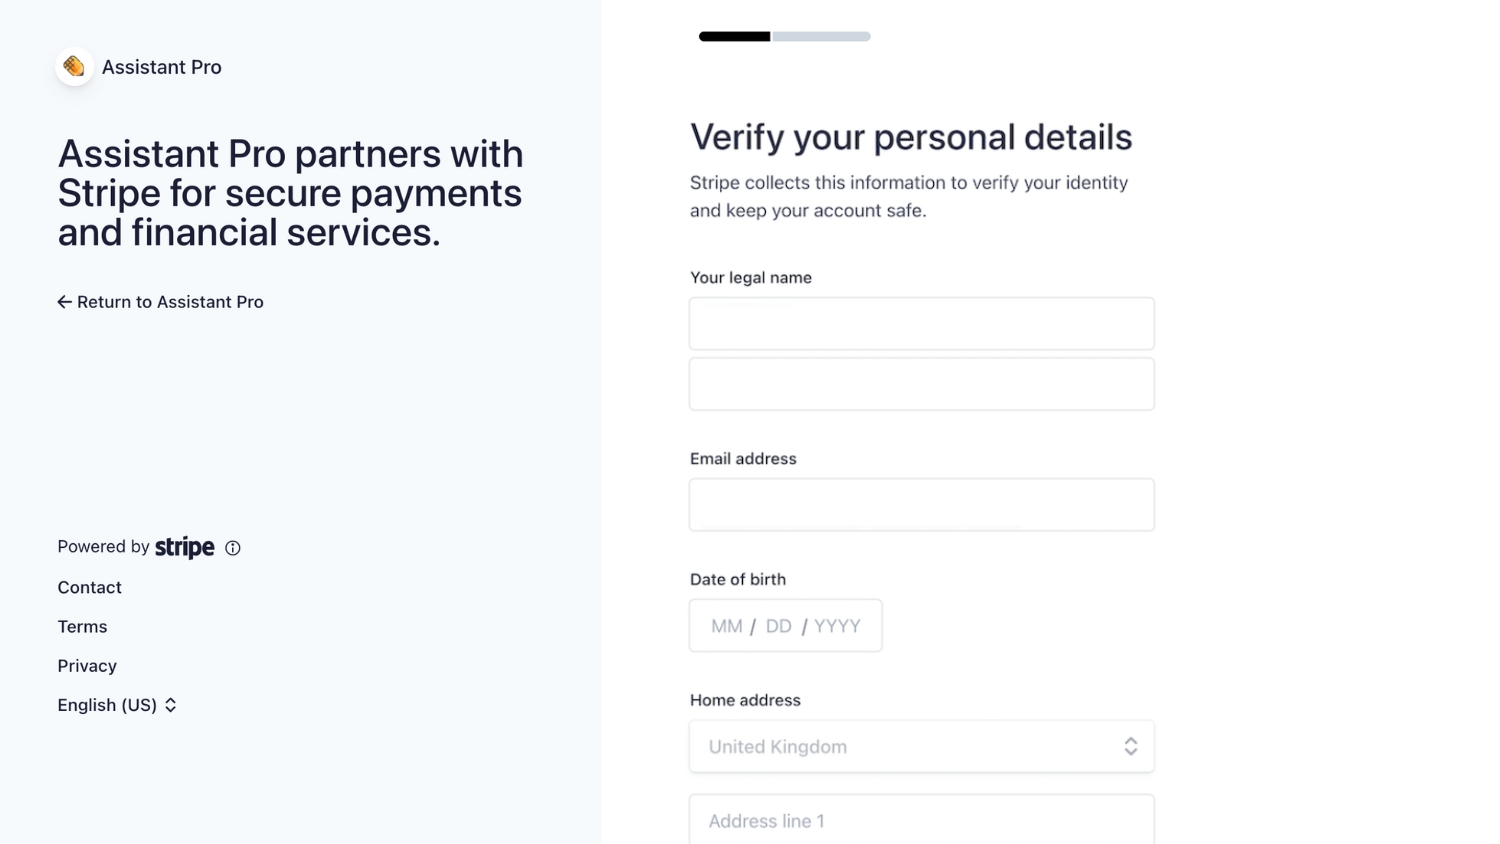
To verify your details, fill out your name, email address, and date of birth. Stripe will also need your home address and phone number:
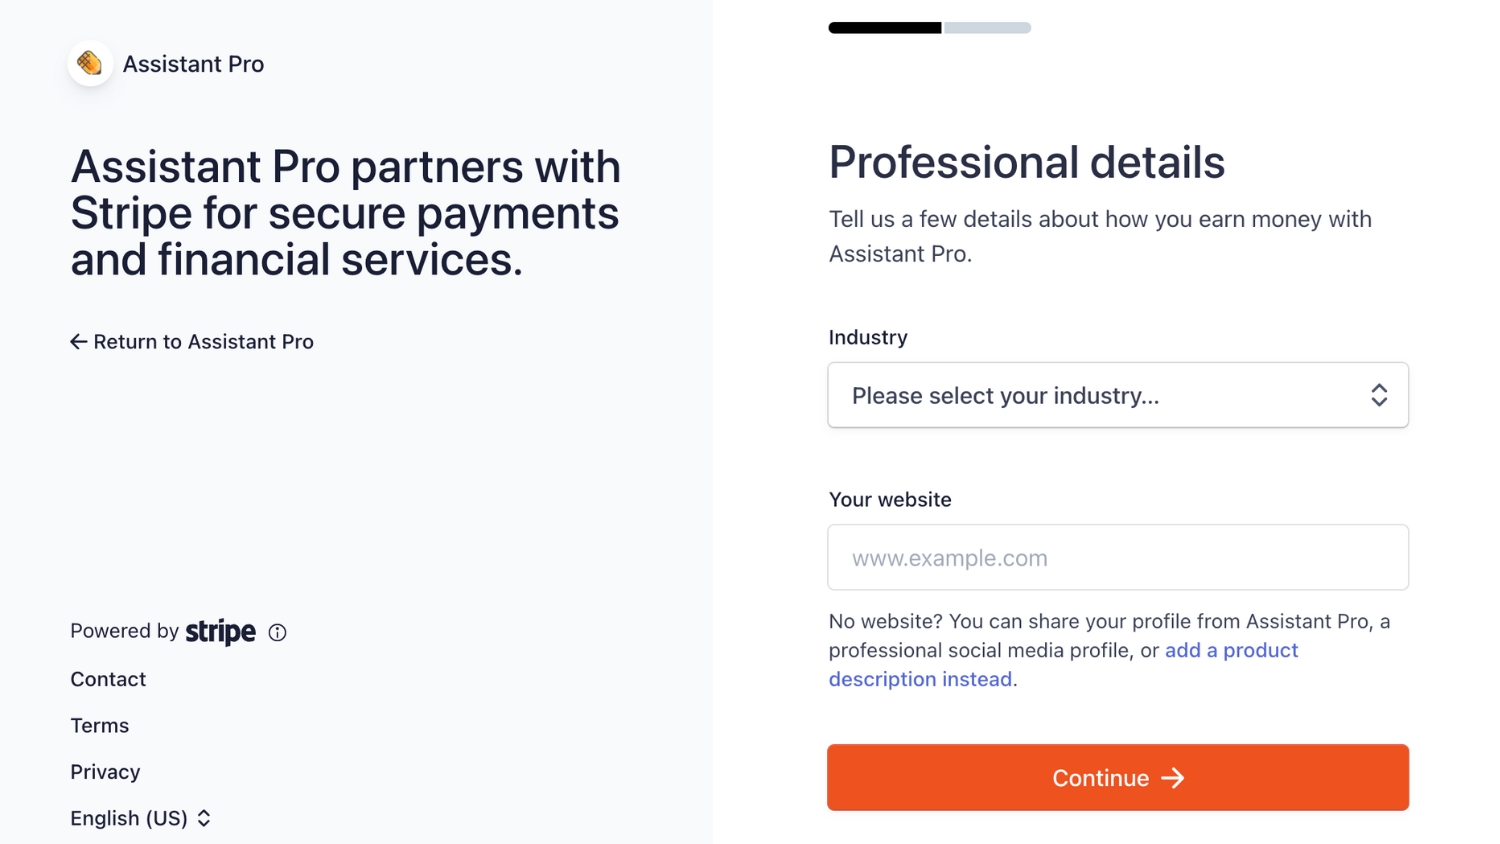
Next, pick an industry. You should also add your website’s URL before hitting Continue:
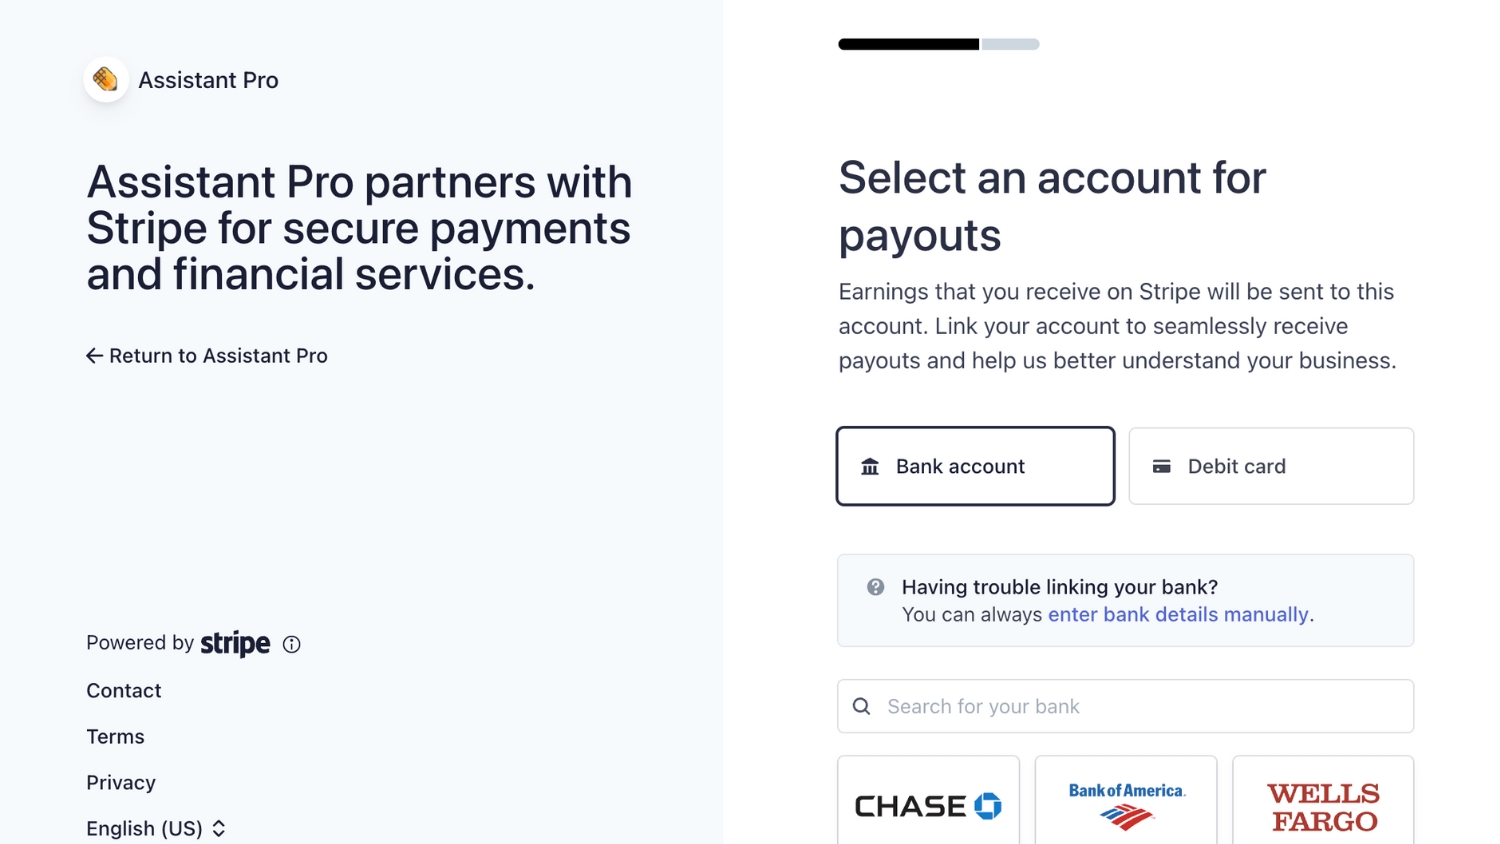
Enter your bank account details. Once you’re done, click on Save:
As a final step, you’ll be able to review the information you submitted. After confirming that everything is correct, you’ll be redirected back to Assistant Pro:
Step 4: Create a Community Library and List Your Designs For Sale
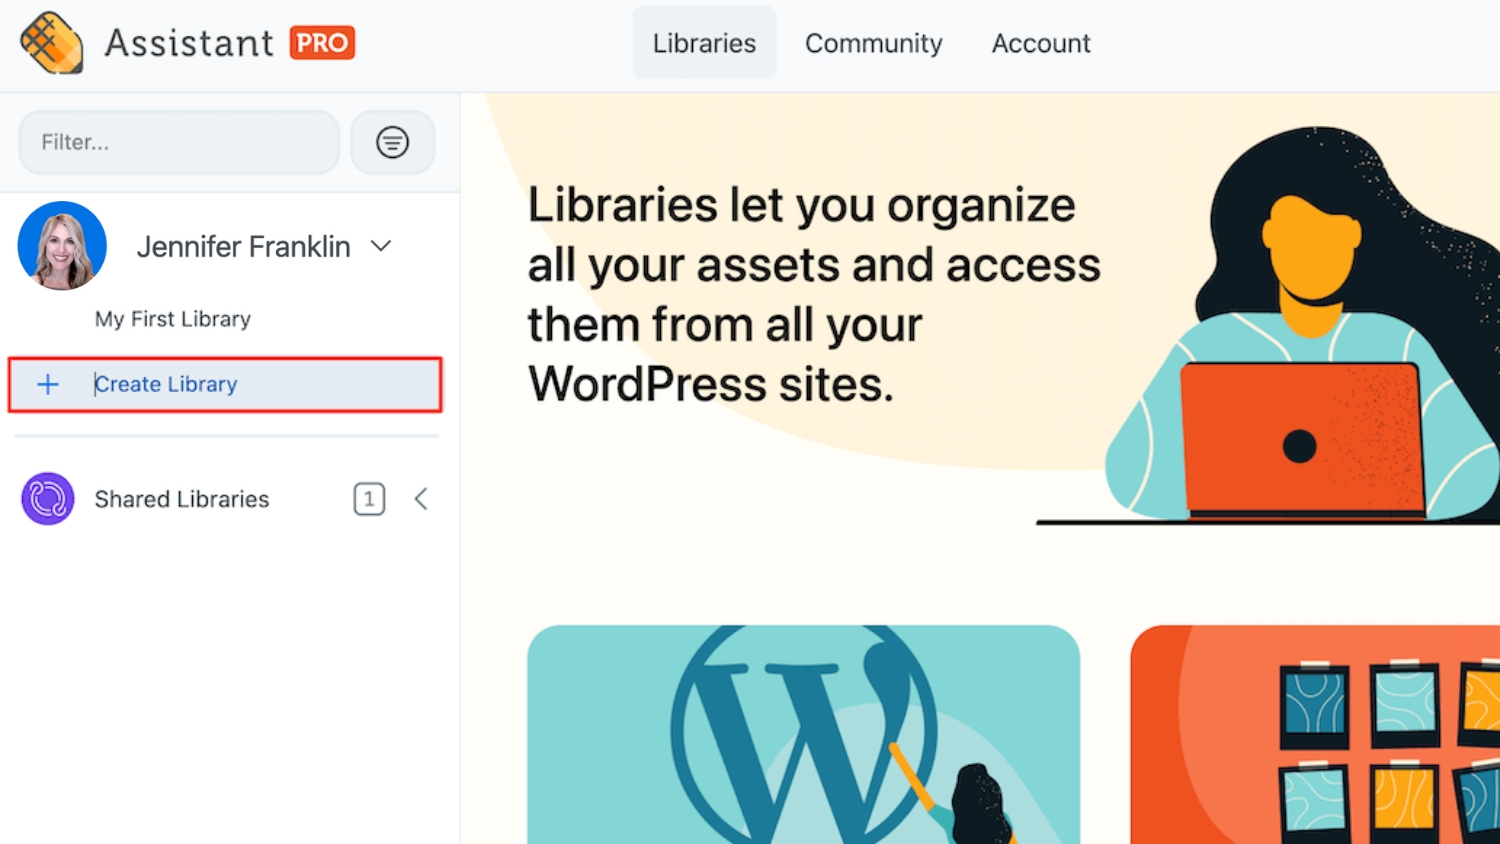
Now that you’ve set up a seller account with Assistant Pro, you can start creating and selling your content. On your dashboard, click on Create Library and give it a name:
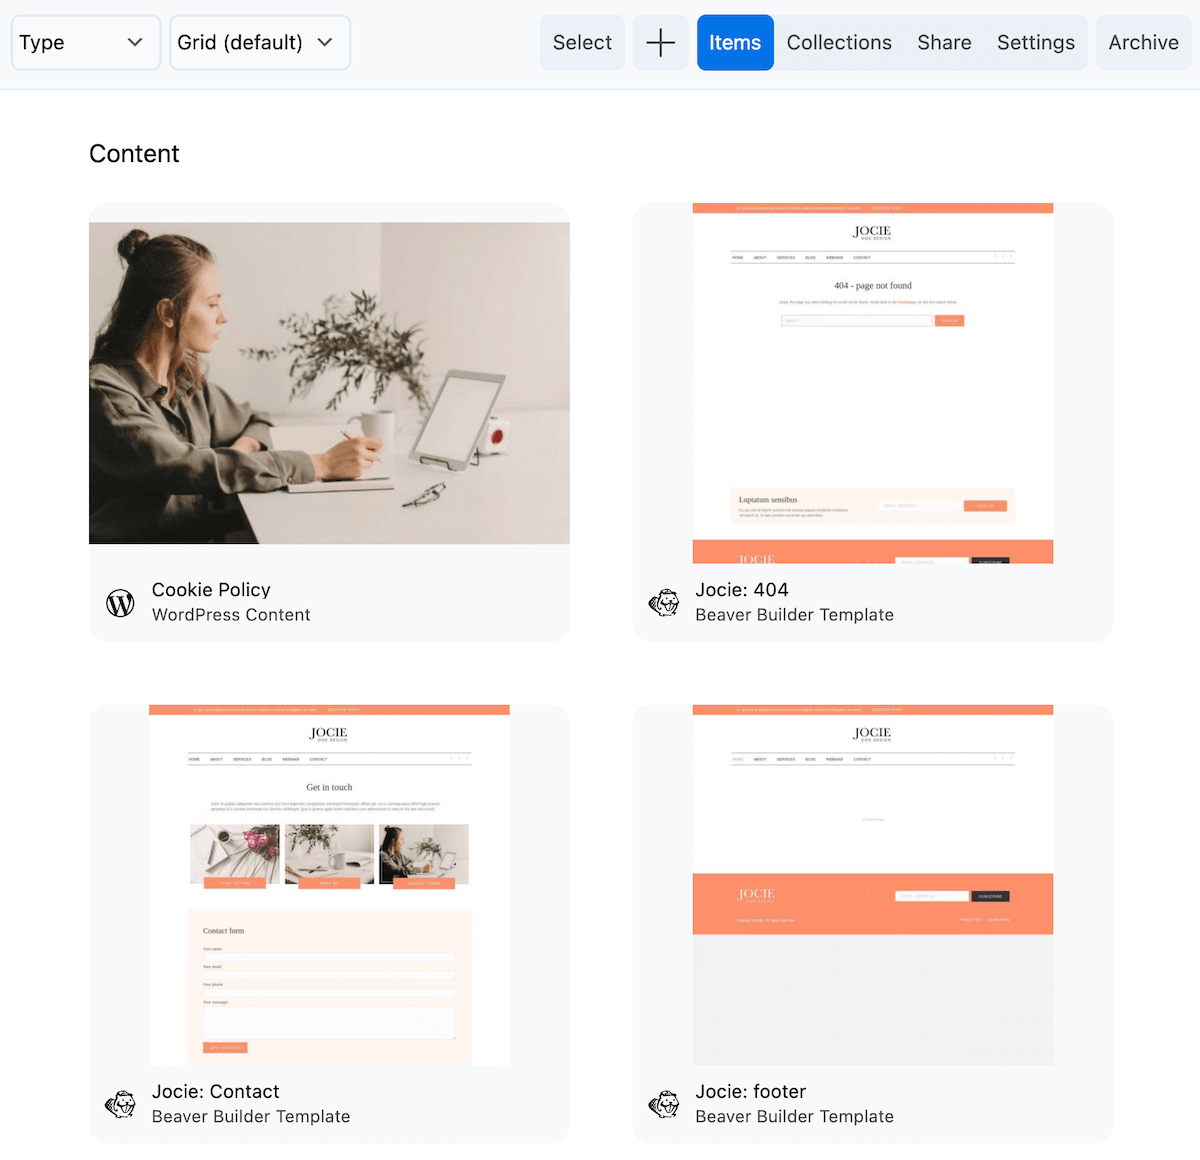
Then, upload and save your web design assets to the library. You’ll be able to add items such as page builder templates, media files, and color palettes:
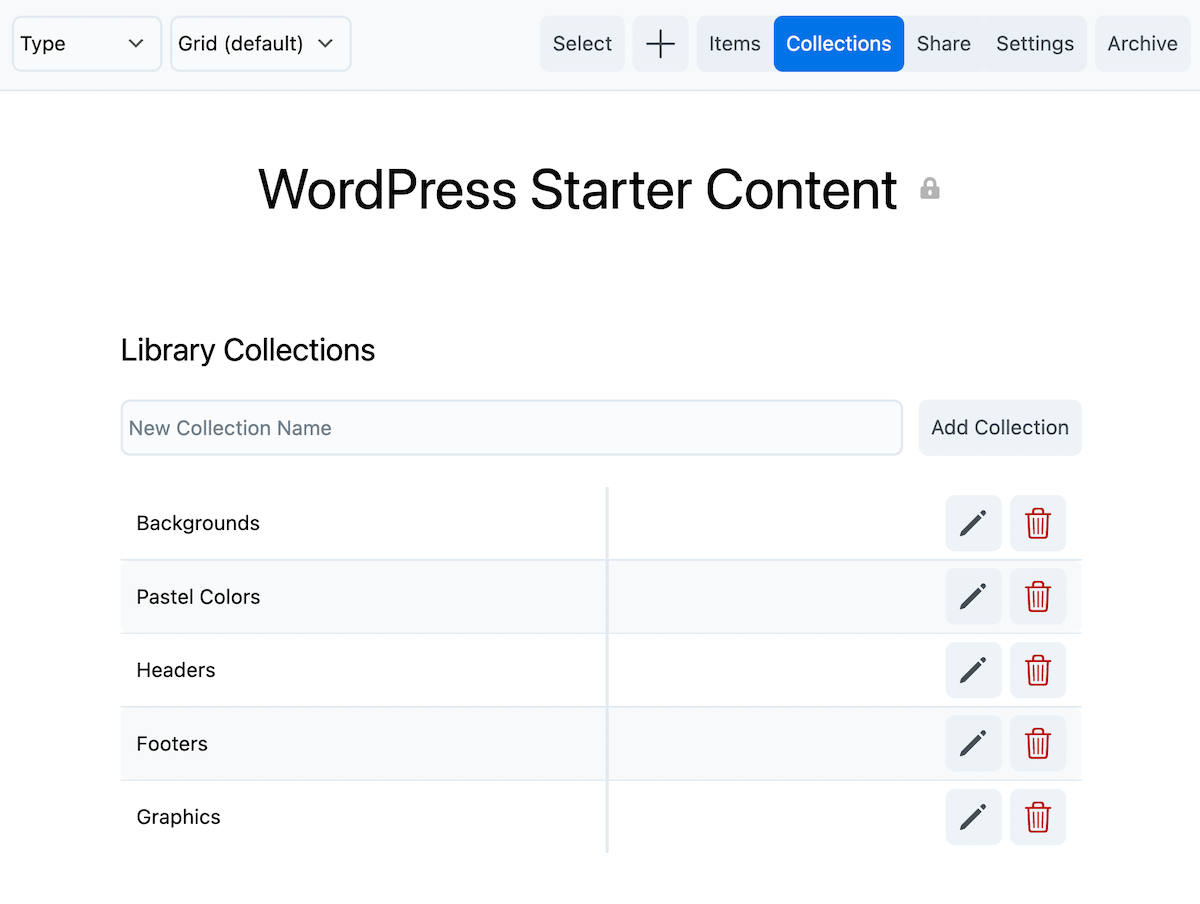
To allow customers to easily find certain items within large libraries, consider adding collections. These are more specific categories that will help to organize the library.
For example, you might create a collection for backgrounds or graphics:
Once your library is ready to sell, click on the Settings tab. We recommend adding an eye-catching featured image and title to encourage users to open and purchase the library:
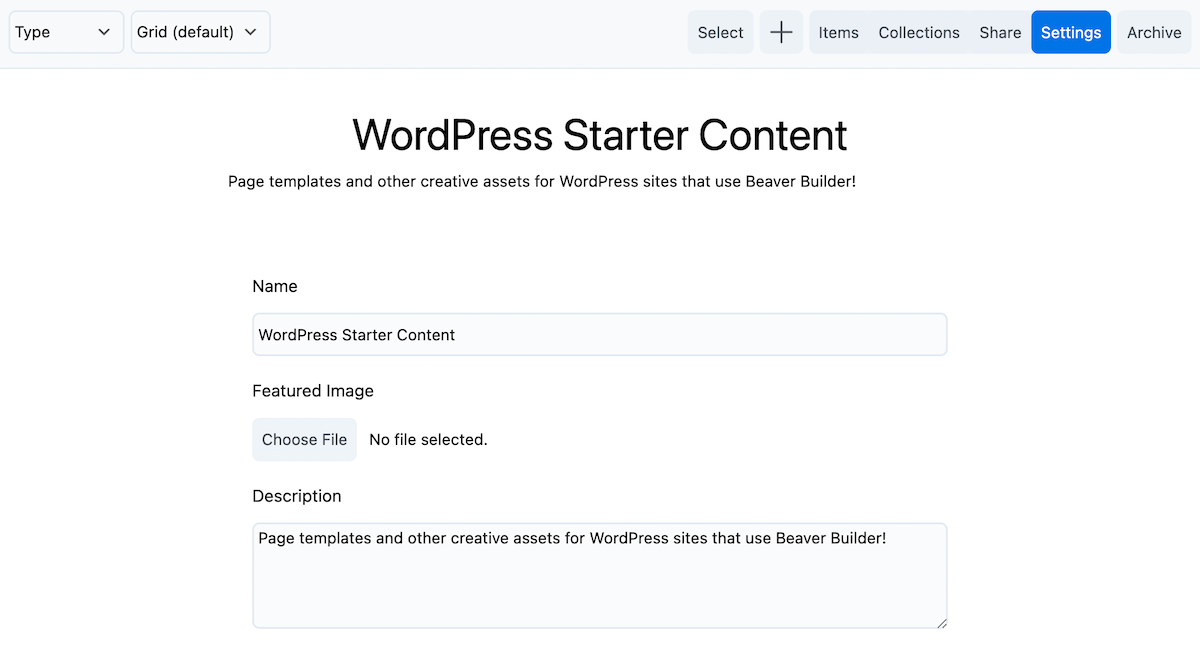
In the description, you can mention what tools you used to design the content. For example, you might want to explain that your templates are best used with a page builder like Beaver Builder or the Block Editor.
Next, make sure the Visibility setting is set to Public. Under For sale, choose Yes. Finally, set a price:
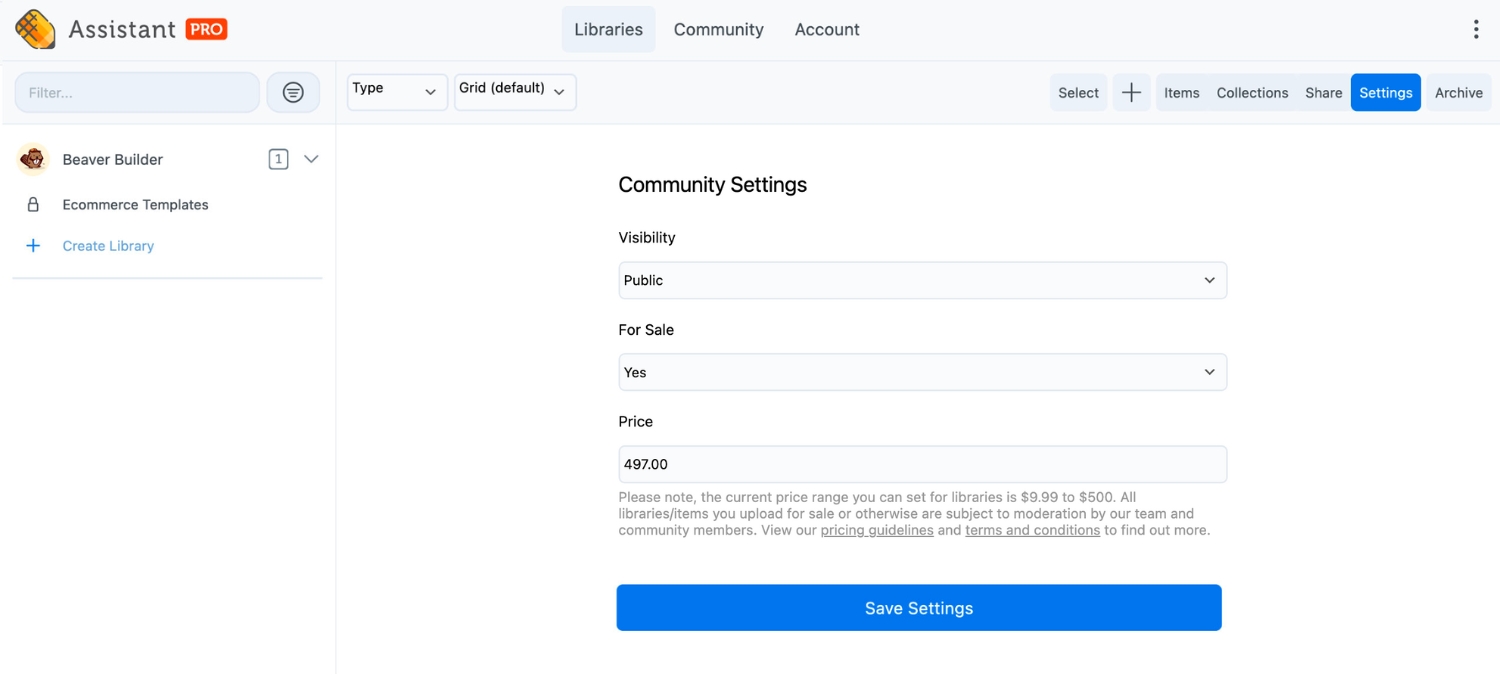
Note that sellers have the opportunity to set their own pricing within a minimum and recommended price range depending on the asset(s) being sold. Please review our pricing guidelines and terms and conditions before listing your library.
Conclusion
Rather than relying on individual projects for income, you could start listing your designs for sale on a marketplace like the Assistant Pro Community. Here, you’ll be able to sell entire libraries that include your custom WordPress templates, vector files, and more.
To review, here’s how to sell your designs with Assistant Pro:
- Sign up for an Assistant Pro account.
- Apply to become a seller.
- Connect your Stripe account.
- Create a Community library and list your designs for sale.
Related Questions
How Can I Make Money From My Web Designs?
WordPress designers and developers can list their web designs and other creative assets for sale in the Assistant Pro Community. Sell your page builder templates to a global audience in our marketplace and earn money while we handle payments and manage the platform.
How Much Do I Charge For Website Design Templates?
Within the Assistant Pro Community, Sellers have the opportunity to set their own pricing within a minimum and recommended price range depending on the asset(s) being sold. This ensures our Sellers are focused on providing quality work and earning fair value in tandem. We thoroughly encourage you to do your own market analysis on setting prices in order to remain competitive with the industry. Below you’ll find a helpful pricing guide:
- Full Website Template Library – i.e all page templates (Home, About, Pricing, etc.), colors, website parts/assets
- Suggested price range of $100 – $500
- Minimum price of $20
- Landing Page Template Library – i.e. niche based landing pages (Sales, Marketing, etc.), colors, page parts/assets
- Suggested price range of $50 – $150/landing page
- Minimum price of $10
- Specialty Landing or Content Page Library – i.e. specialized pages (Sales Funnel, Sign-up/Membership pages, color, pages/parts/assets
- Suggested price range of $50 – $150/landing page
- Minimum price of $5